neuMoGo Tools 1.1
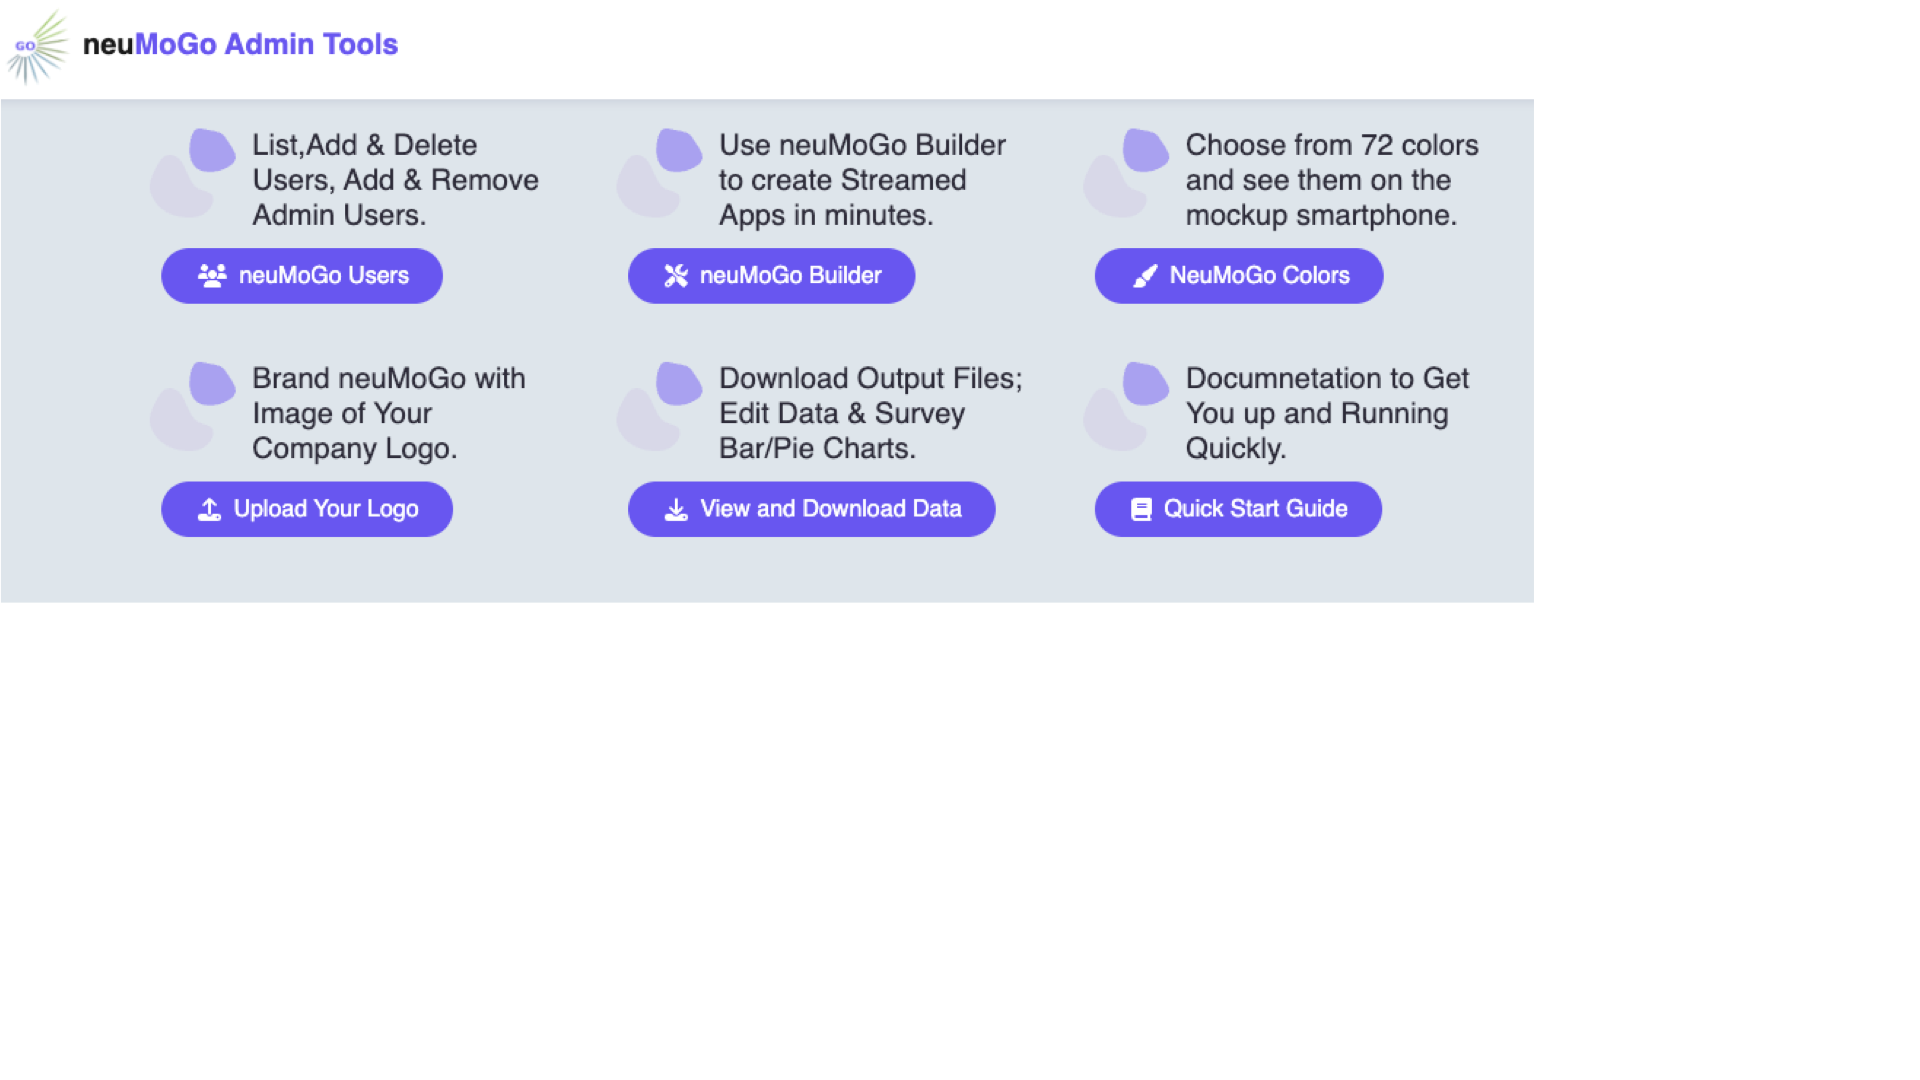
Use the neuMoGo Tools to implement your ideas, select colors, brand screens, manage users and integrate neuMoGo data output.
neuMoGo Tools
| neuMoGo Users |
Use neuMoGo Users to control who has Admin rights to use the Tools and add and delete users, including external users. |
| neuMoGo Builder |
Bring your ideas to life in the neuMoGo Builder with templates for all types of content and AI Assist for unique requests and Surveys . |
| nemMoGo Colors |
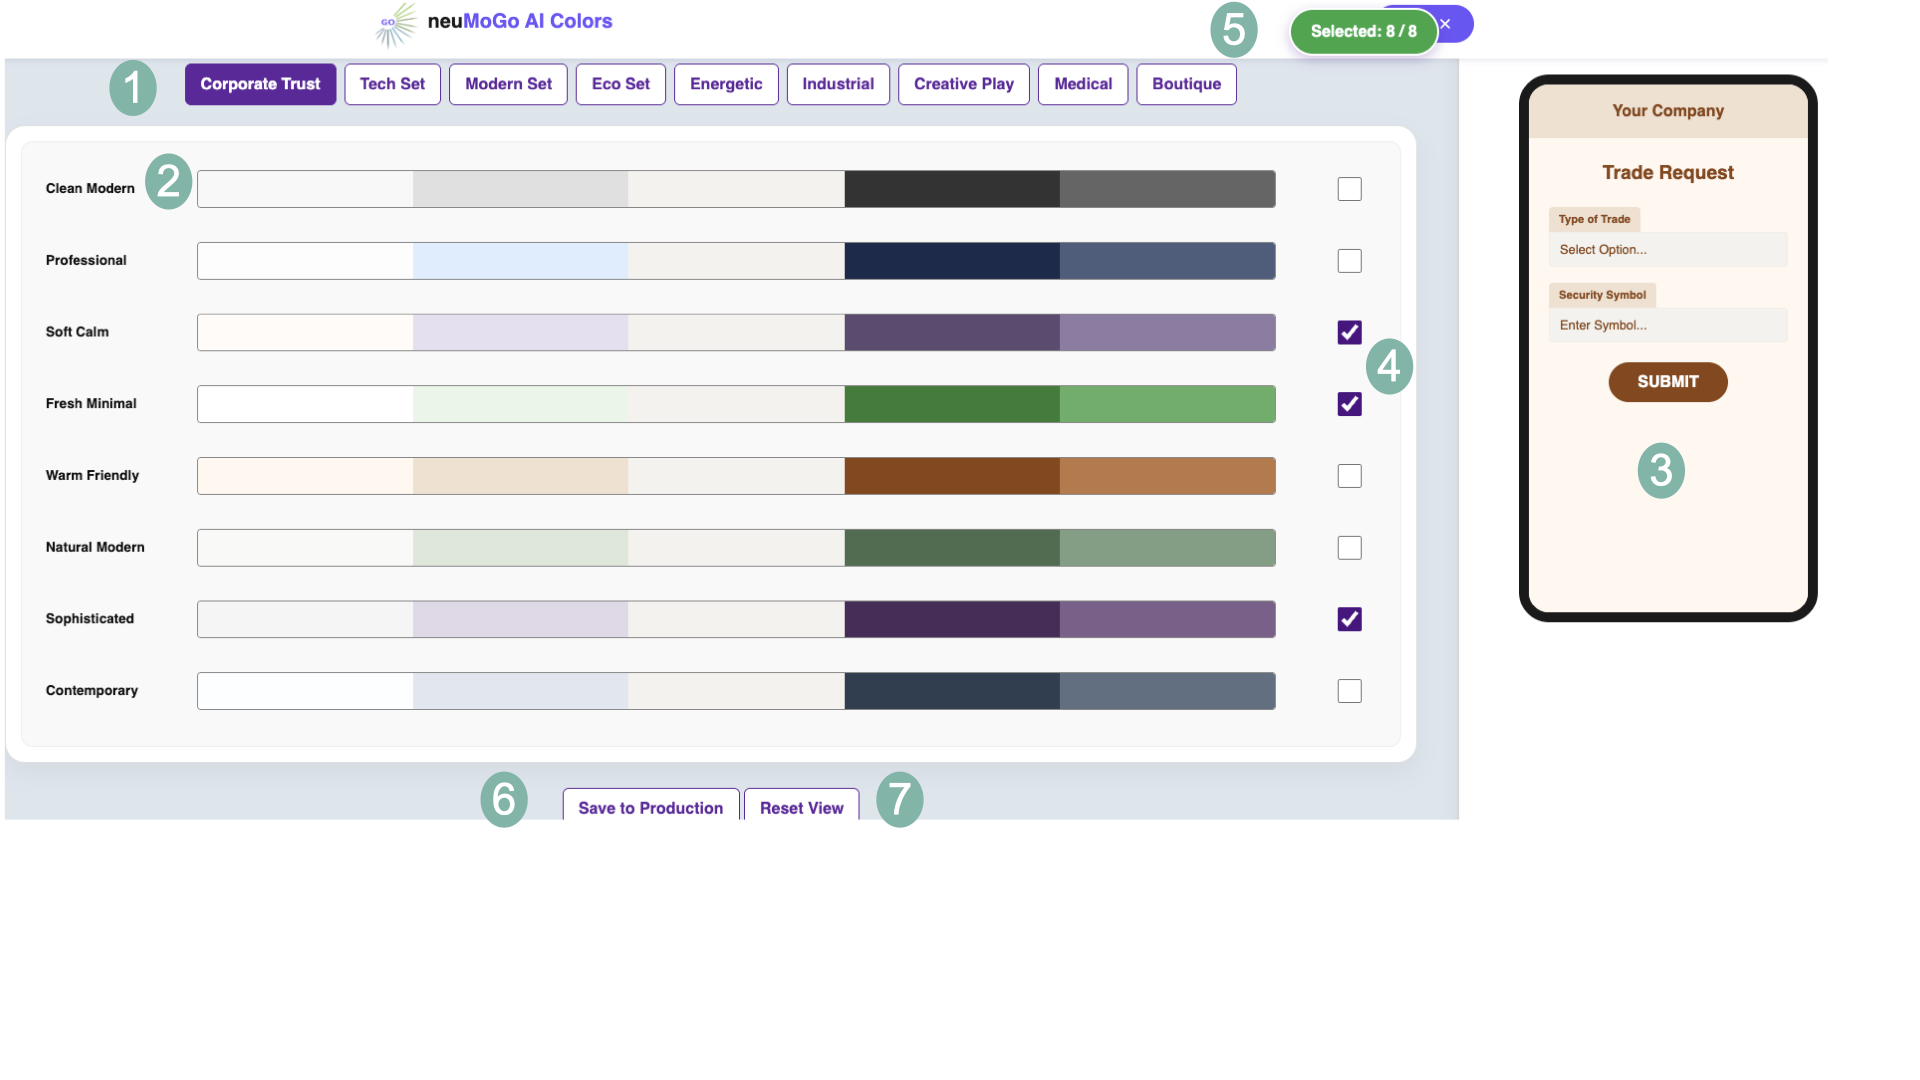
neuMoGo has 72 colors in 9 palettes to chose from. Click on a colors to see how they look on the mockup smartphone. |
| Brand neuMoGo |
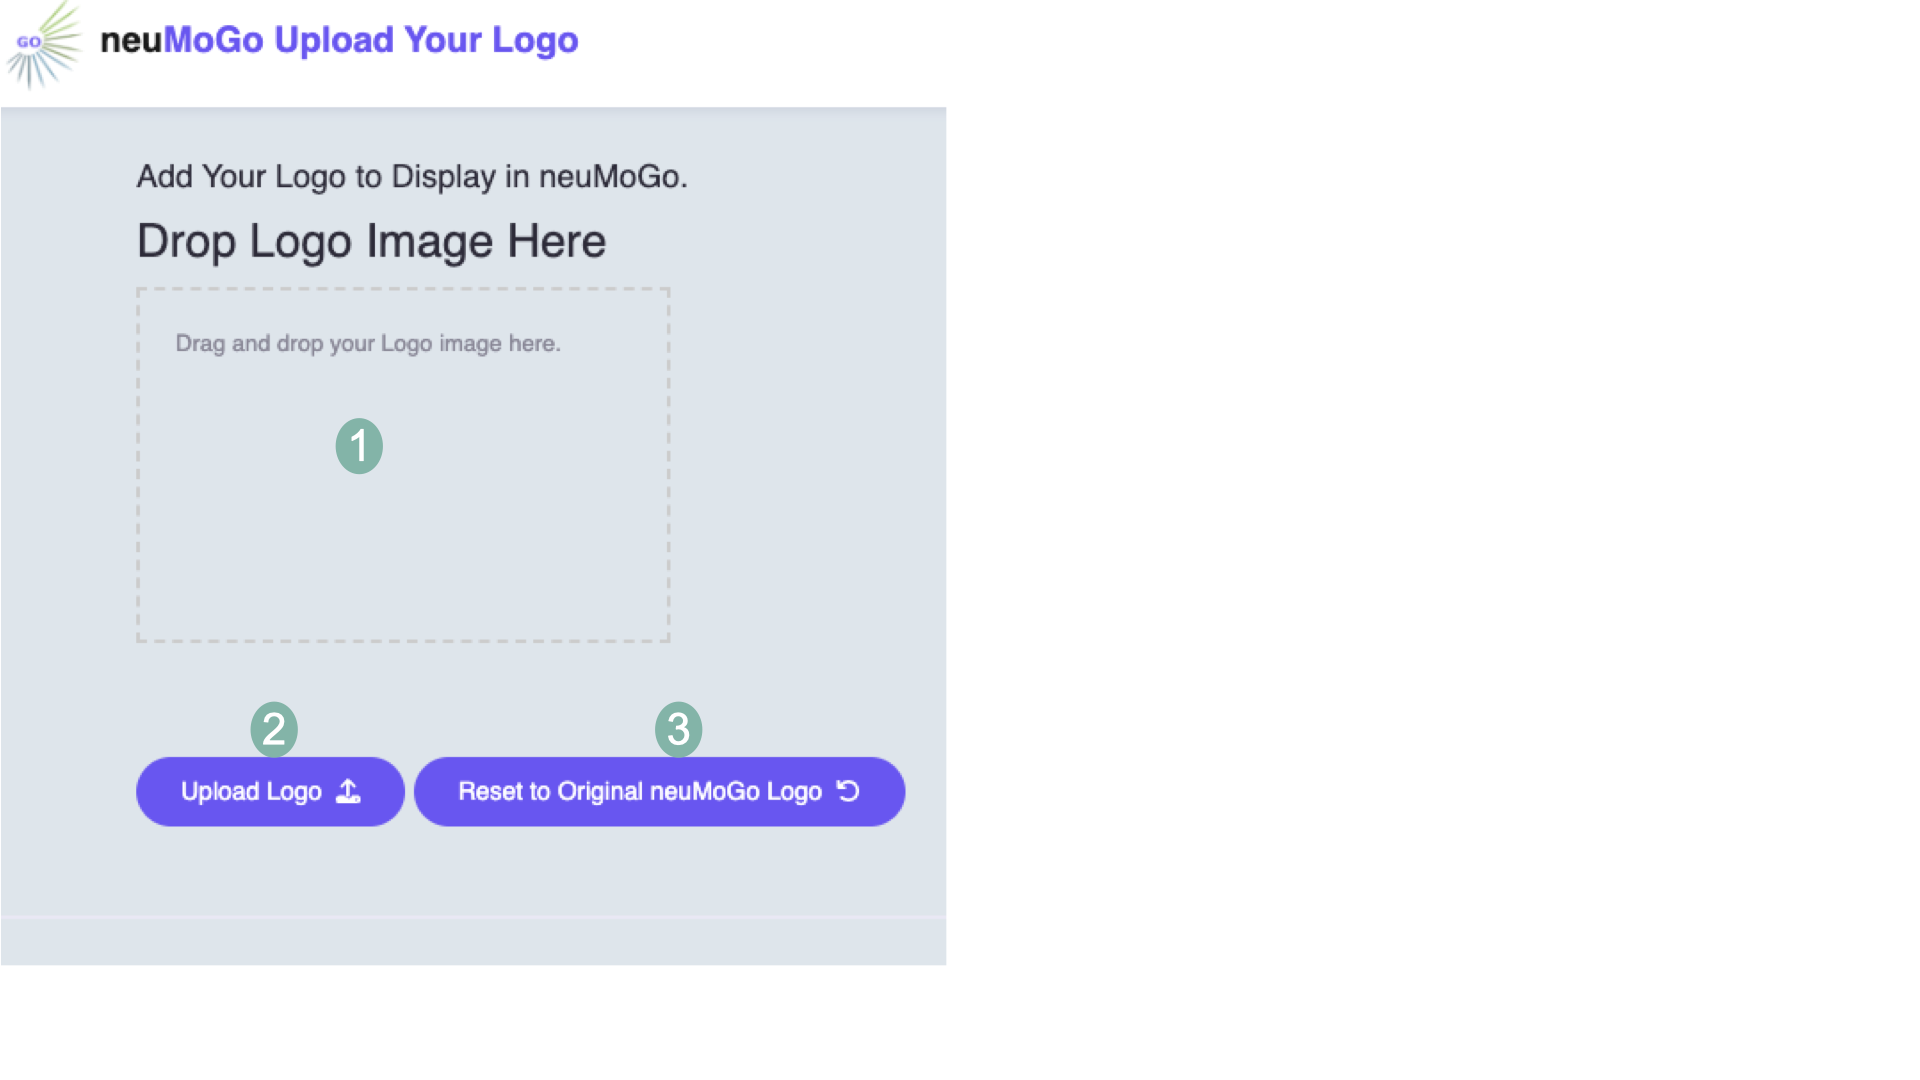
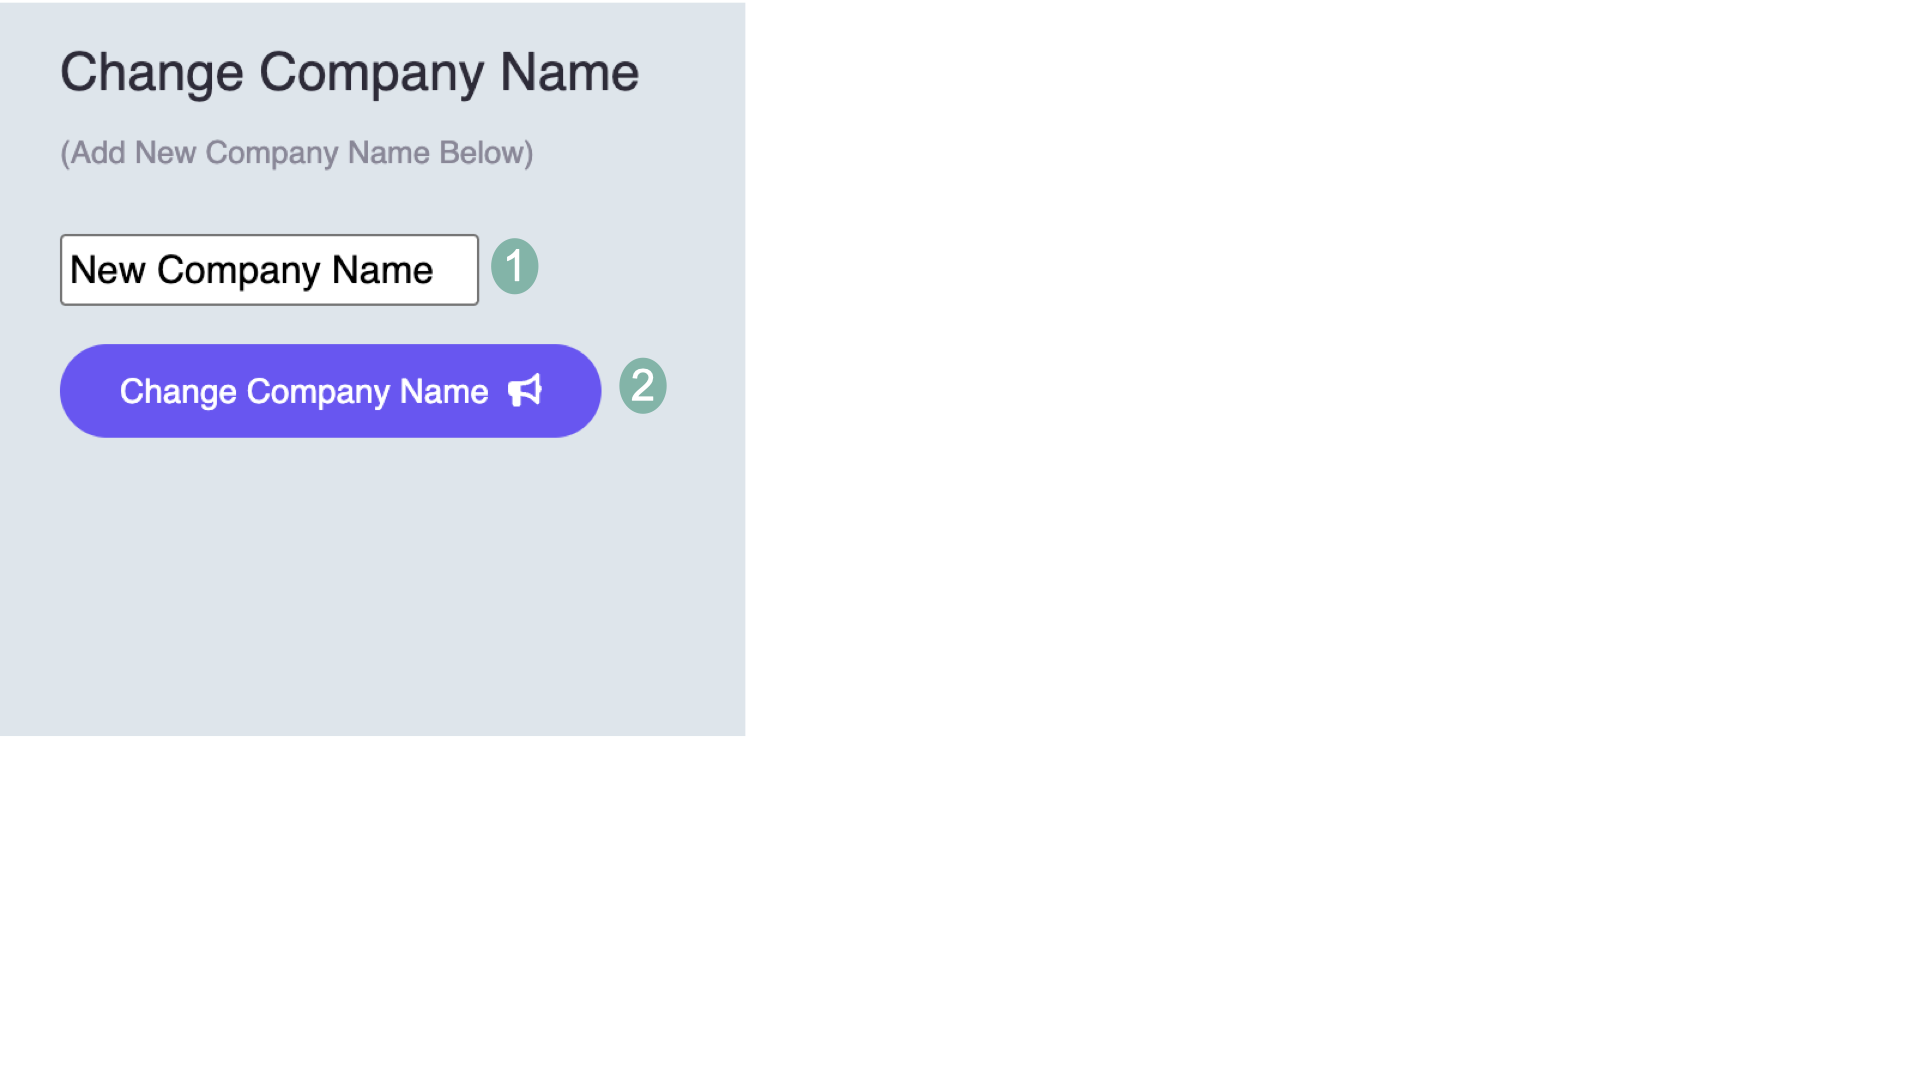
Upload your company logo to appear at top of every screen in the mobile app and change company name when required. |
| neuMoGo Data |
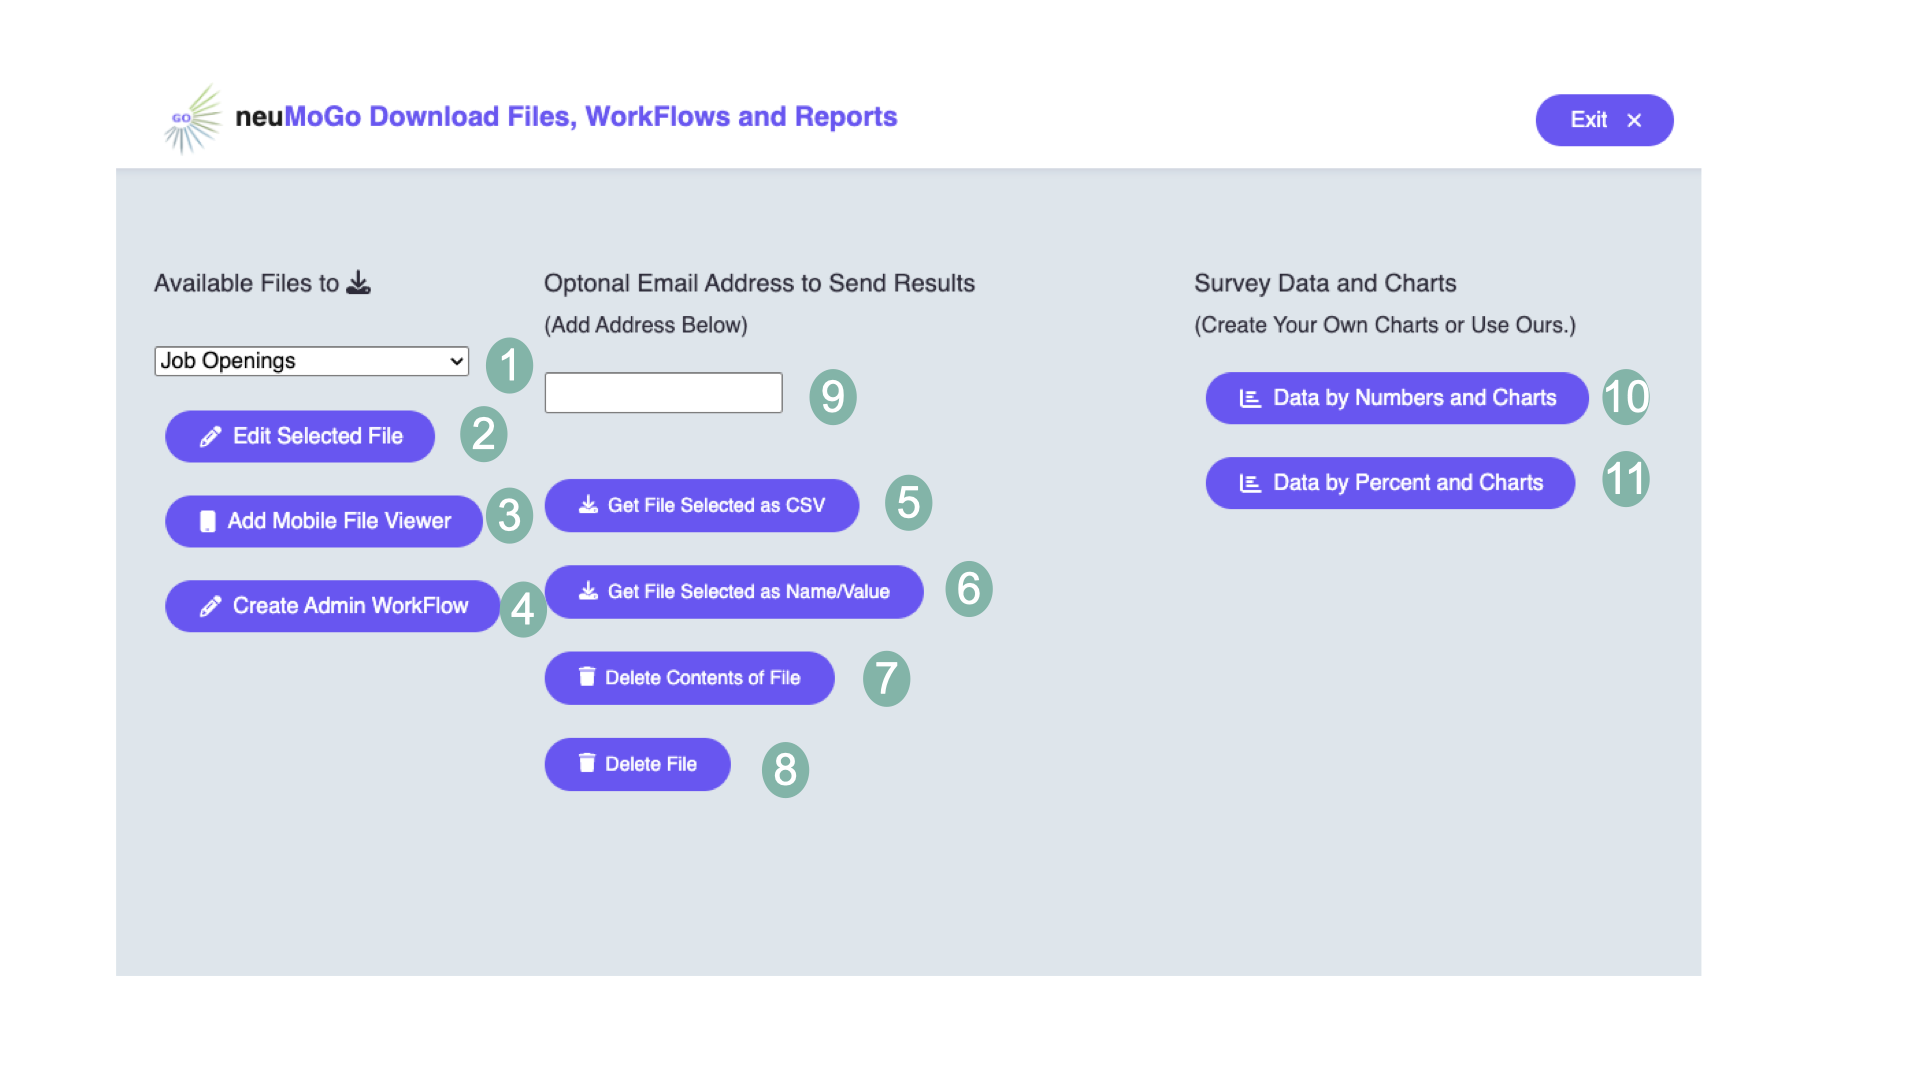
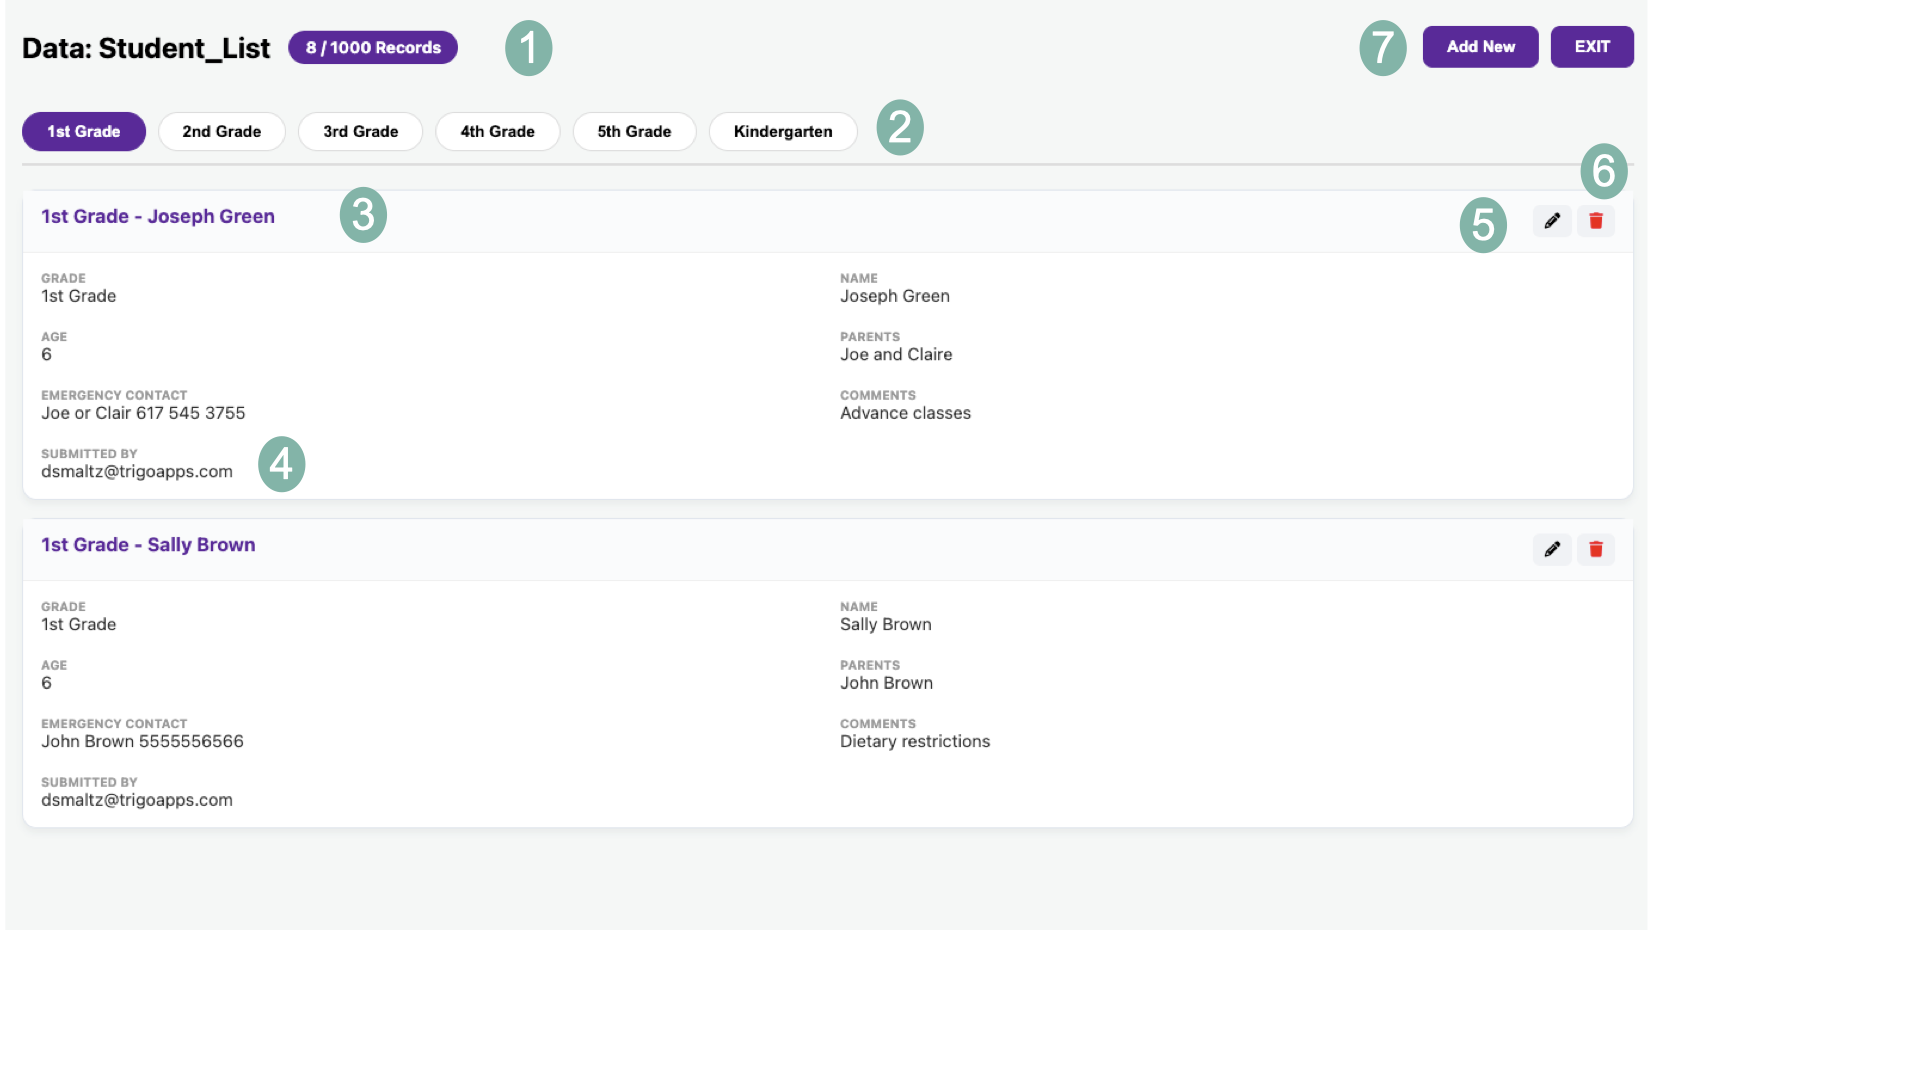
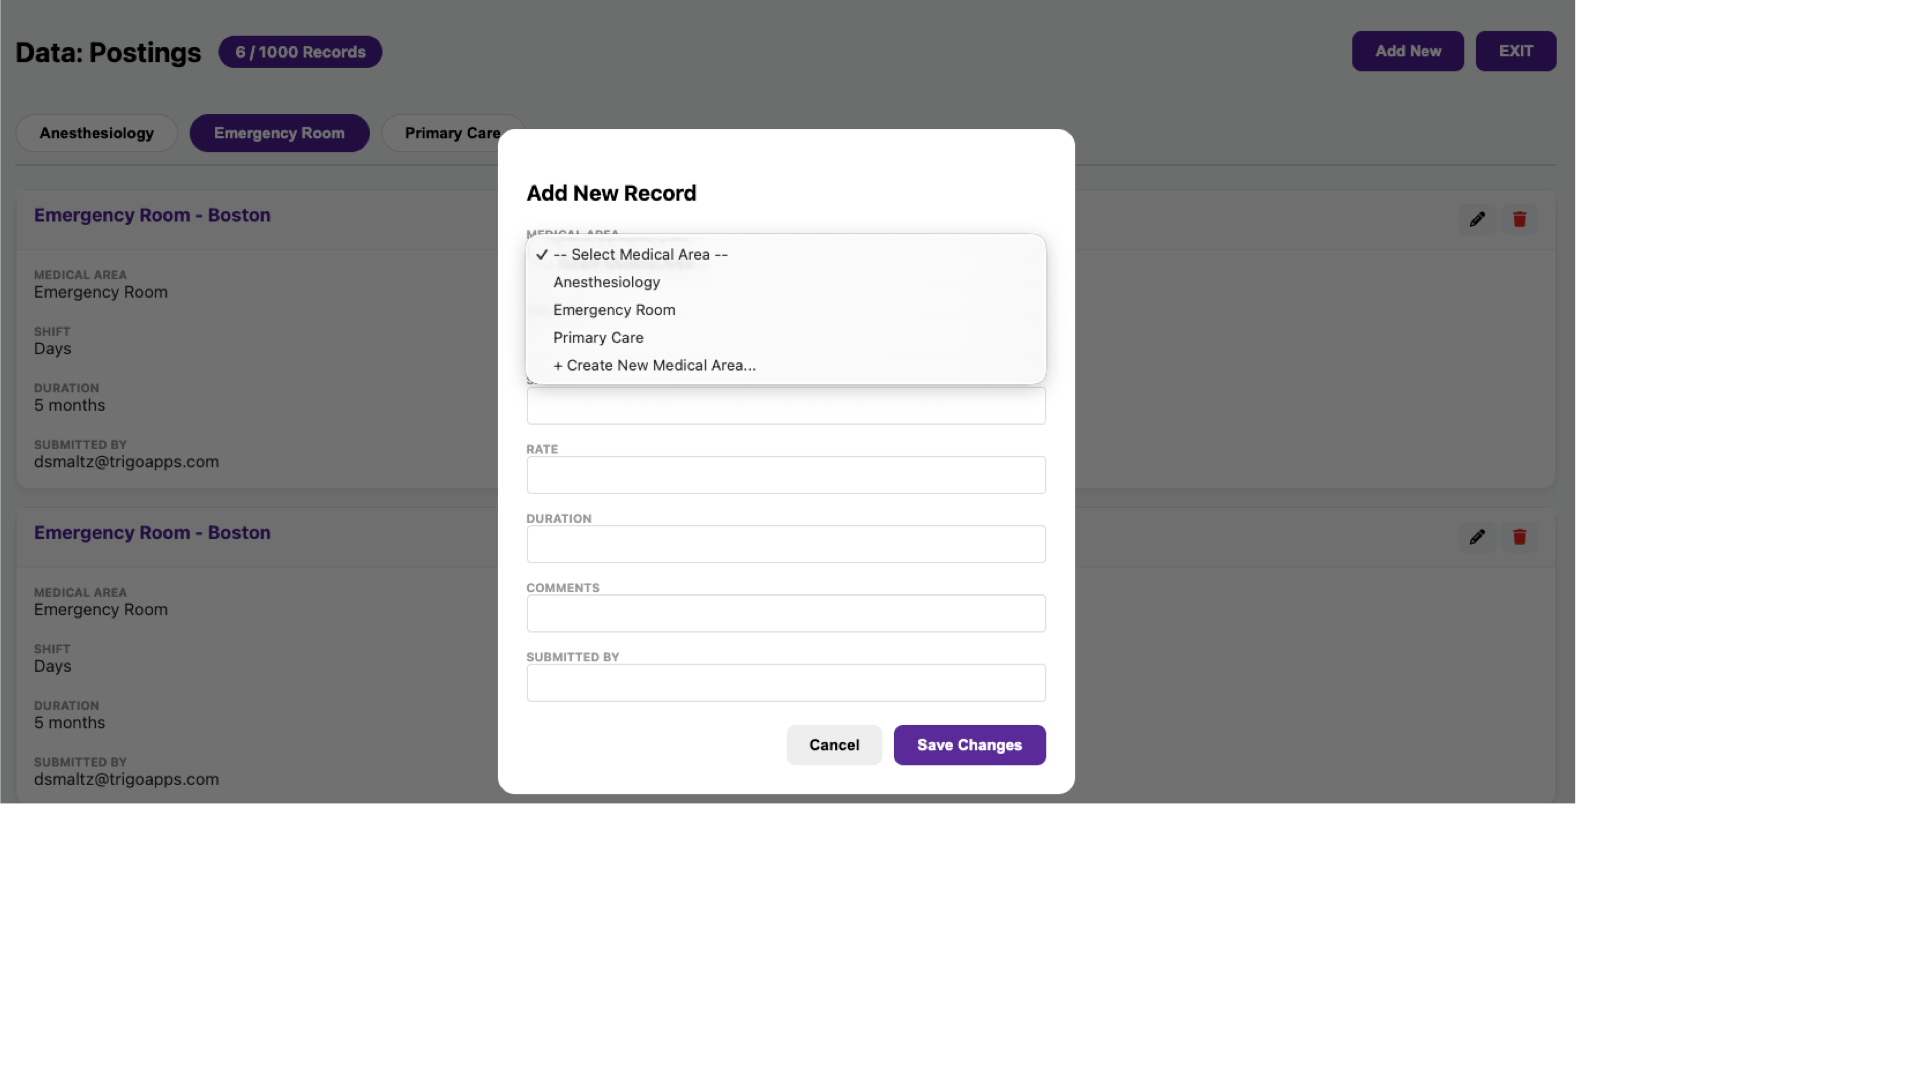
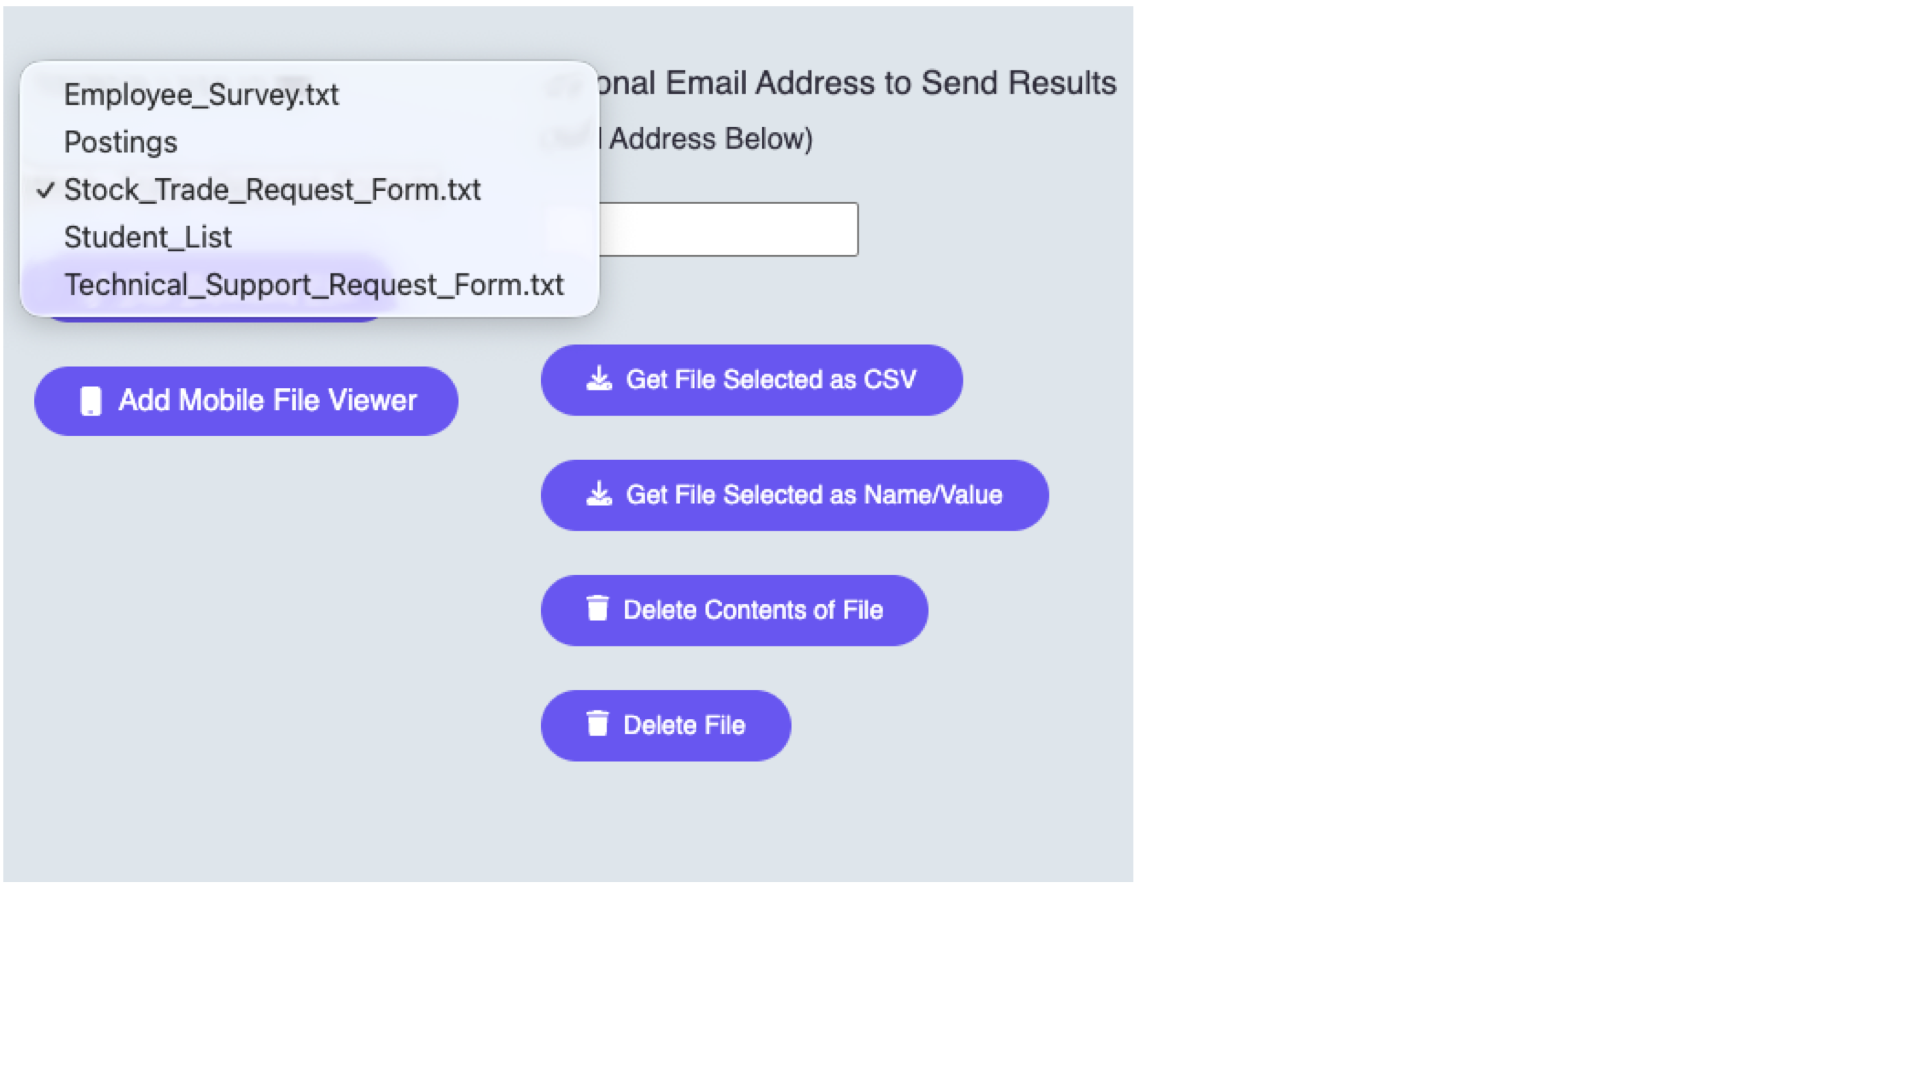
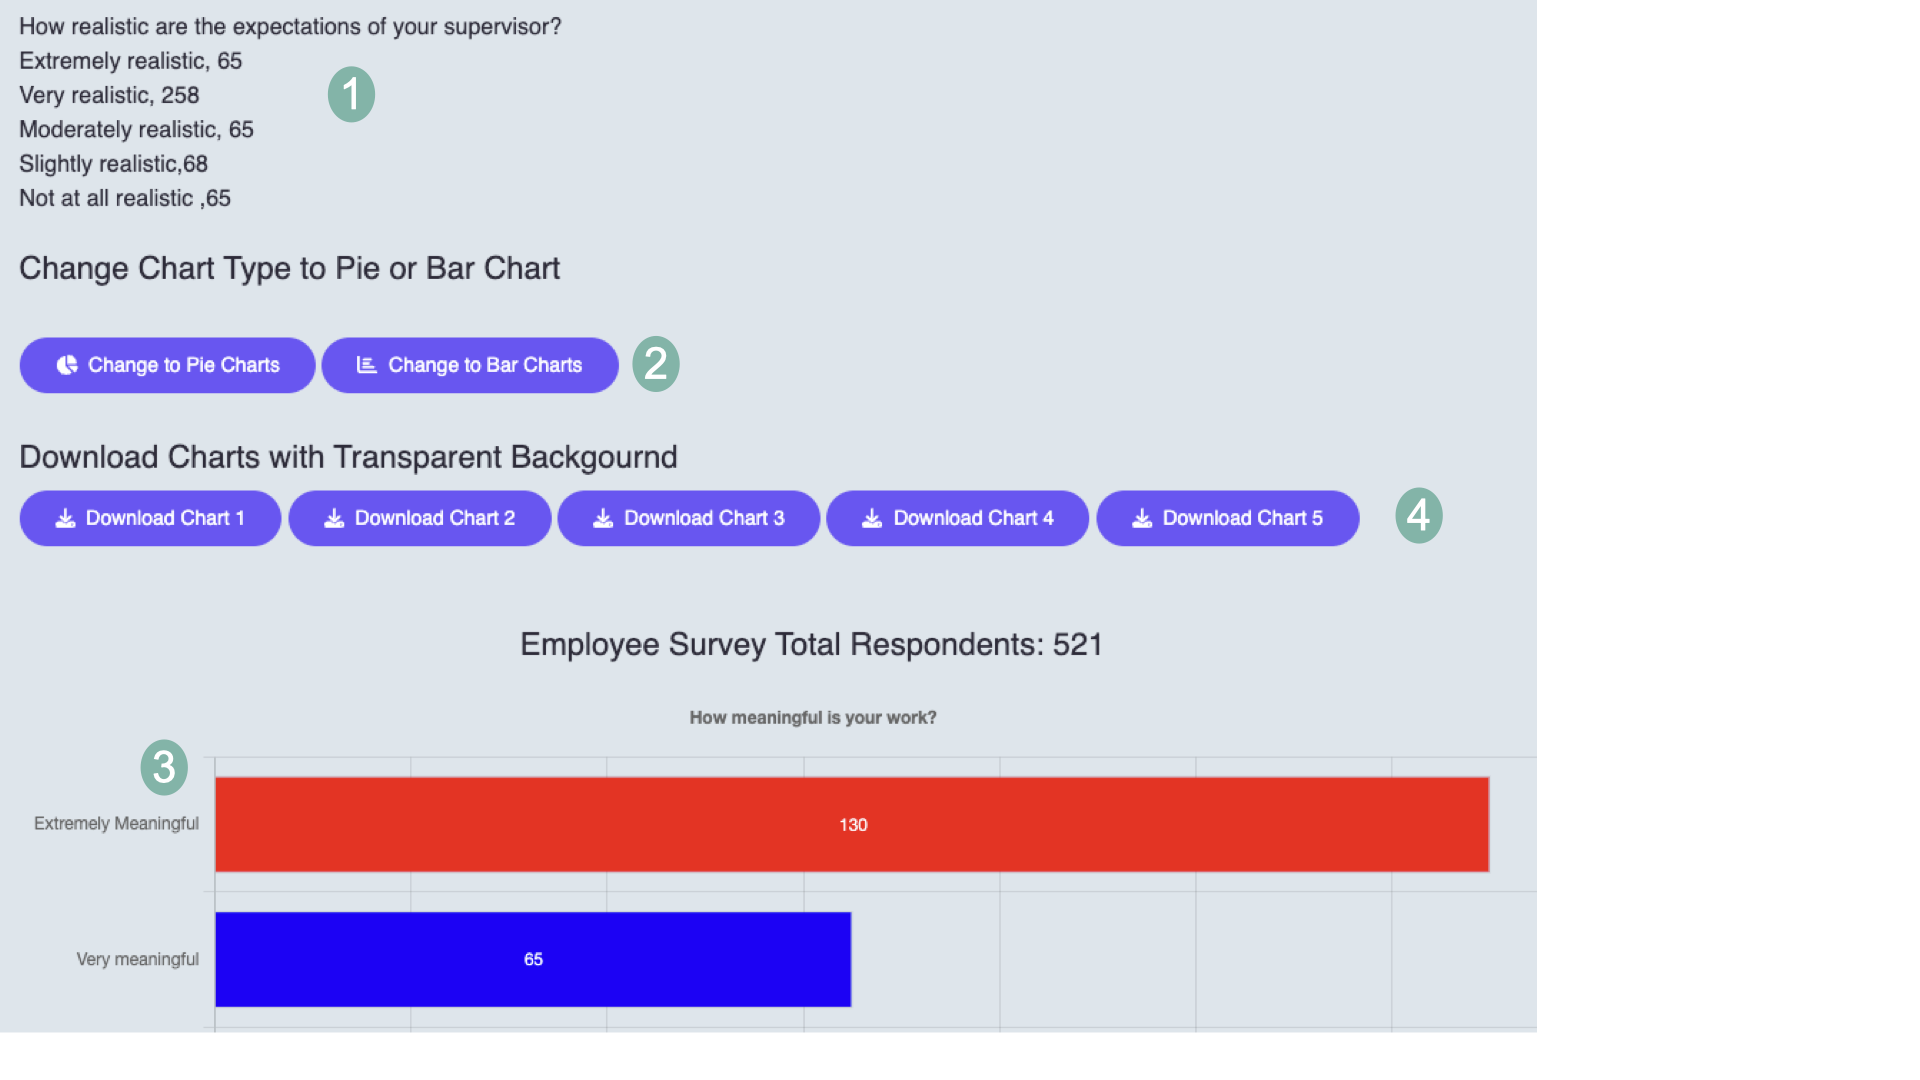
View and edit Workflow data; create a WorkFlow mobile viewer; download data files and truncate or delete them; plus view and download Survey data with bar/pie charts. |
Register for Service 2.1
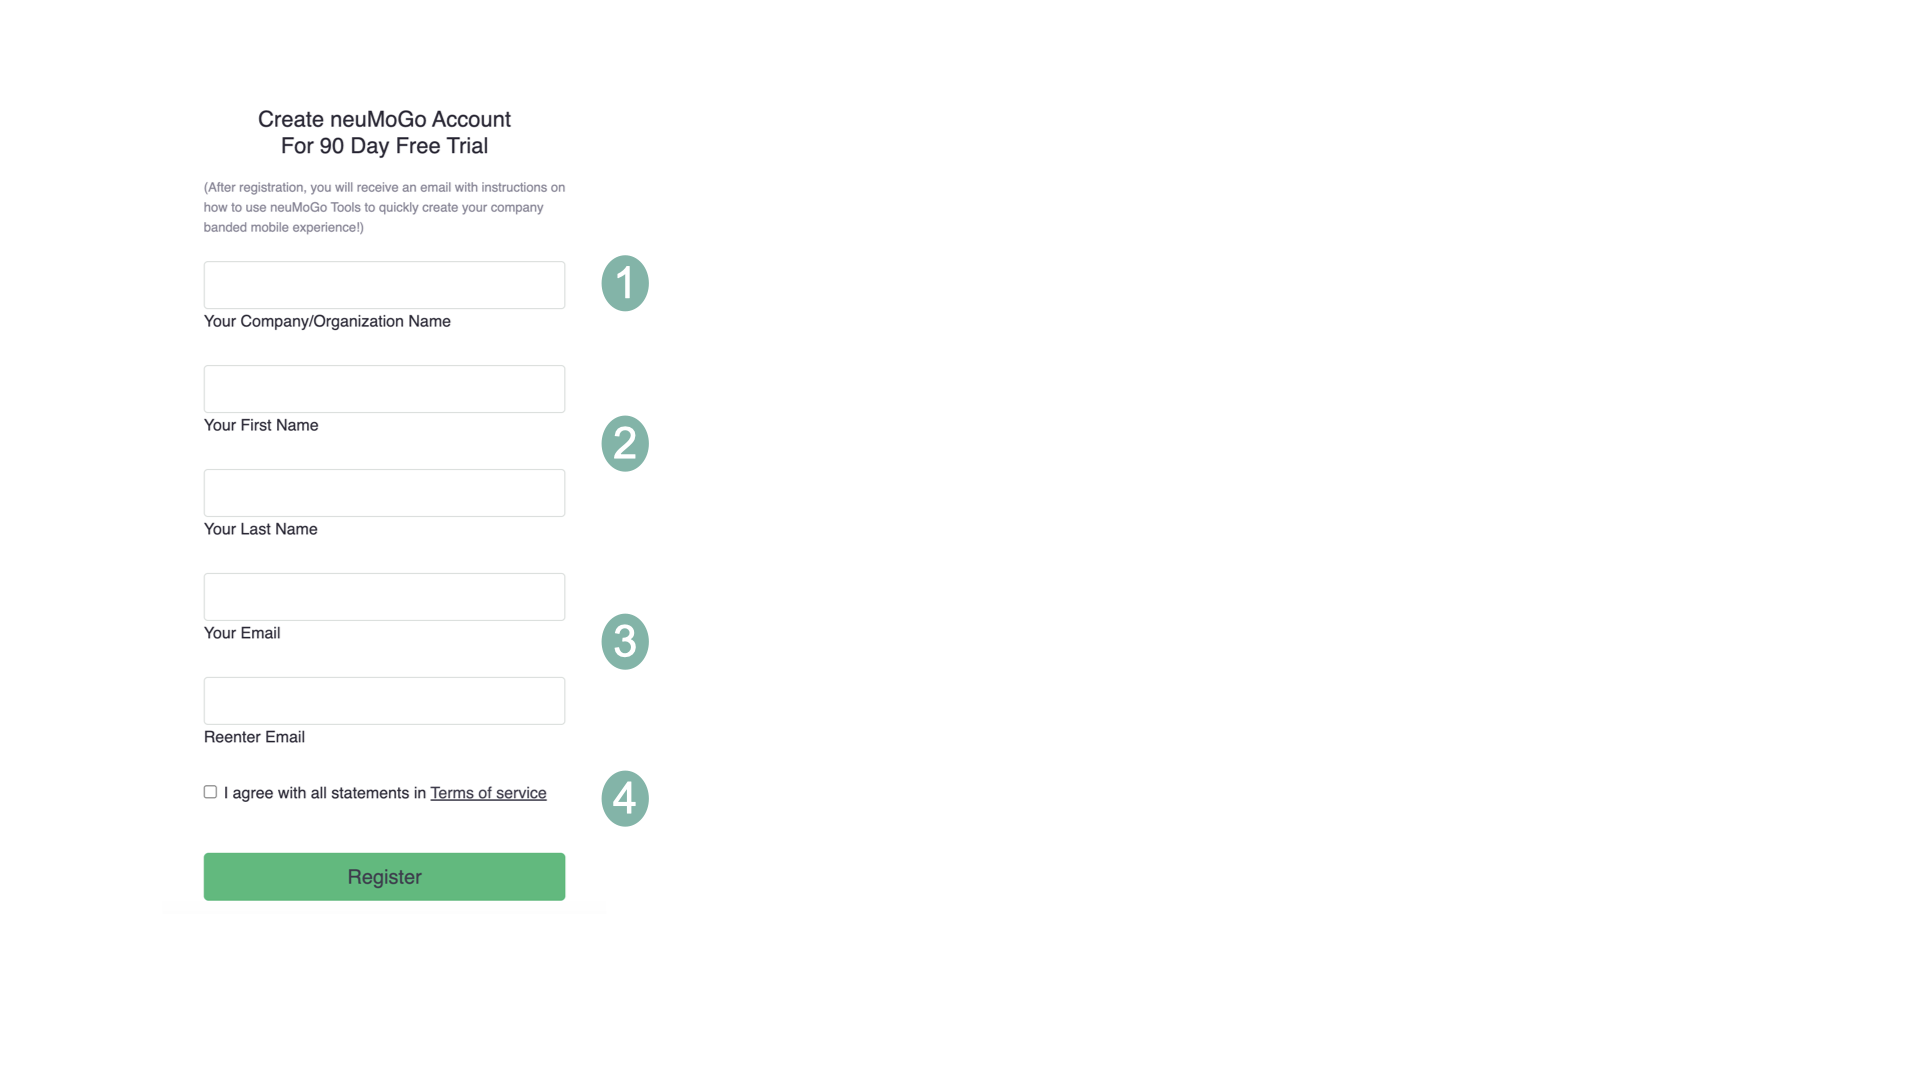
Easily Register your Organization to use neuMoGo.
1 Enter your Organization/Company Name. This name will appear at the top of all your content in the neuMoGo mobile app.
2 Enter your name. All neuMoGo contact will be addressed to this name and email address.
3 Enter your company email address. All user emails will be checked against this @yourCompany.com to register
4 Read and agree to the terms of service and then click "Register".
An "Account Key" and "Security Pin" will be emailed to your email address to use to login to neuMoGo mobile and neuMoGo Tools.
You are automatically granted "Admin Rights" when you register for the neuMoGo service. Use neuMoGo Tools to add 2 more Admins.
Download and login to the neuMoGo App on iPhone or Android 2.2
There is no charge for mobile app downloads.
As Admin you are responsible to invite selected employees to download the neuMoGo App from the App Stores and use neuMoGo.
In the invite include the "neuMoGo Account Key" sent to you upon registration.
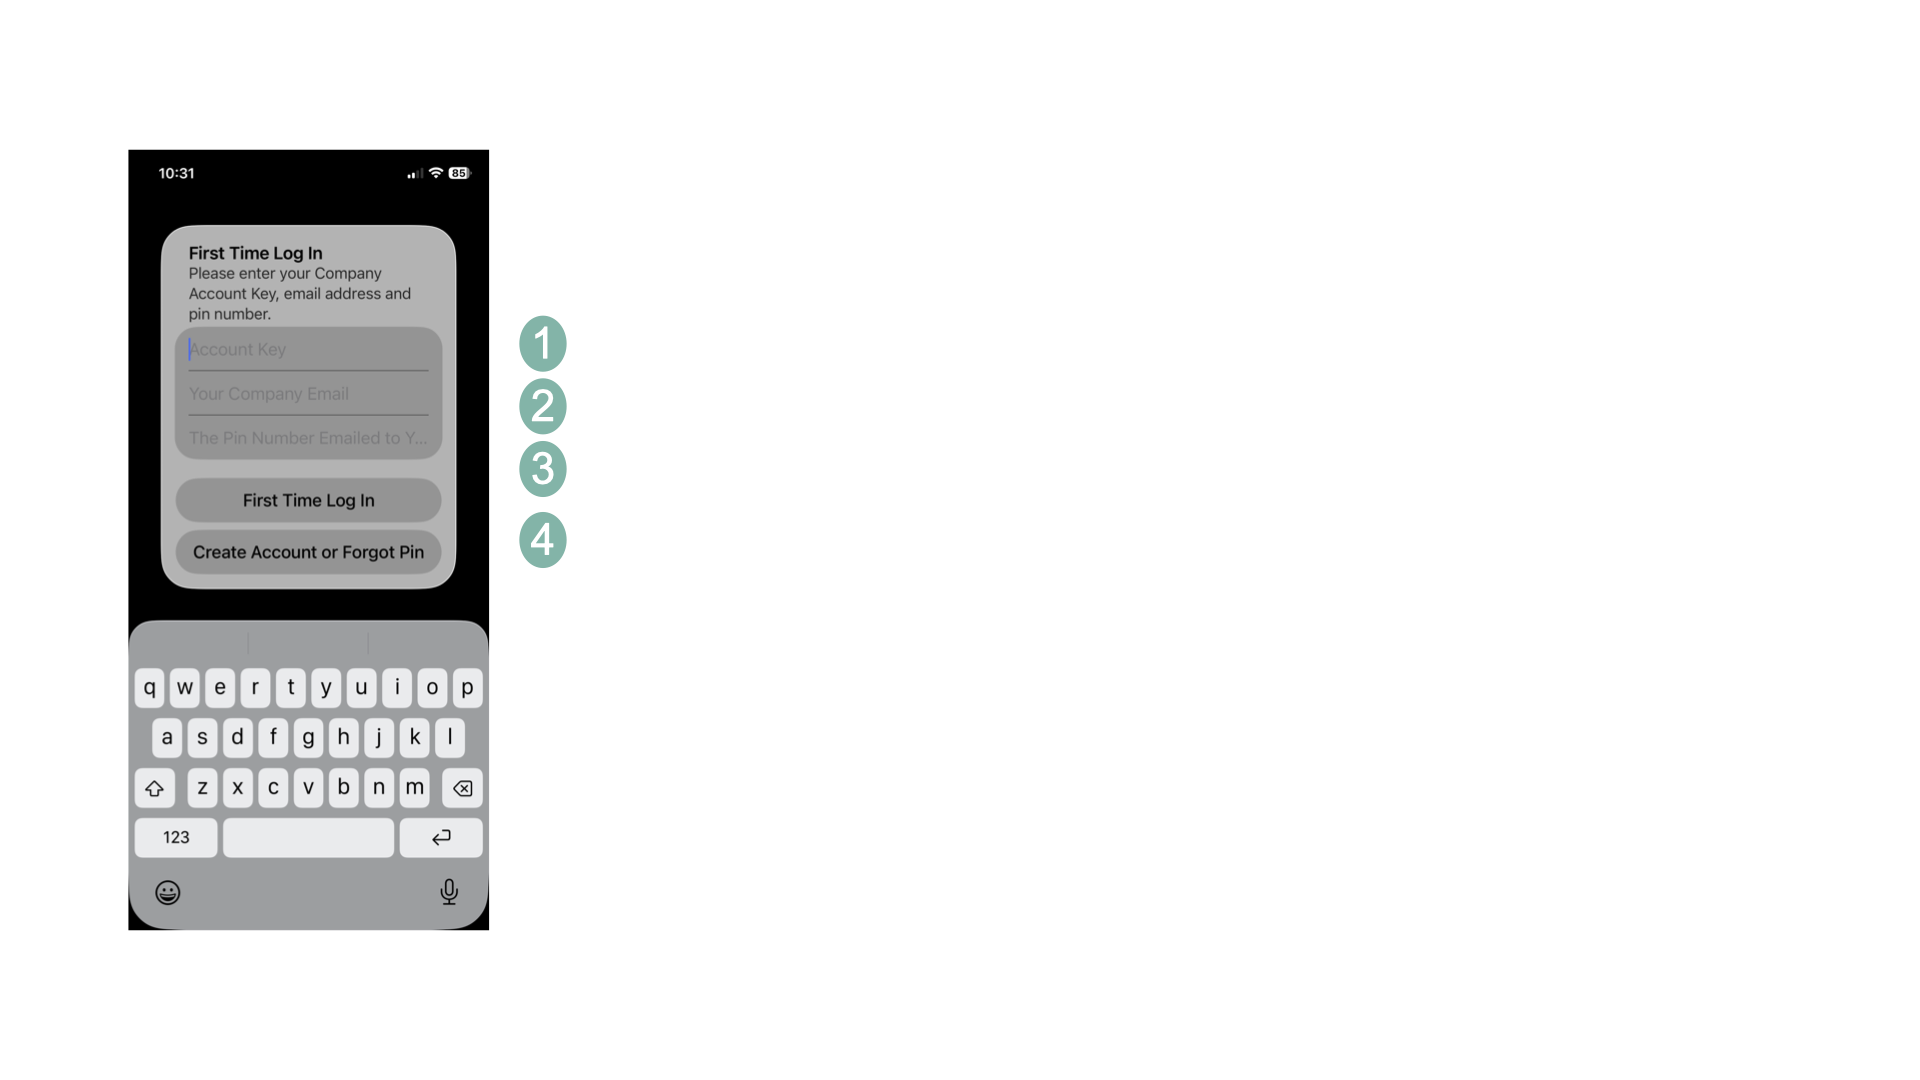
1 Enter the Account Key sent to you after registration.
2 Enter the user's company email address.
3 If the user knows their pin number enter it here.
4 If first time logging in with pin click First Time Login.
If the user needs a pin or forgot the pin, click on "Create Account or Forgot Pin" and the pin will be sent to their email address.
Users must have a company email address to get a pin, so keep the email addresses up to date.
User Management 2.3
Admins can Add, Remove and edit users in the User Management Tool.
When employees leave the company, be sure to remove the email account and delete the email address in this tool. If an email address is not removed from the user list, the employee will be able to continue opening neuMoGo until you manually remove it. The app performs a background check upon opening to verify authorization, immediately prompting the user with a login screen if access has been revoked.
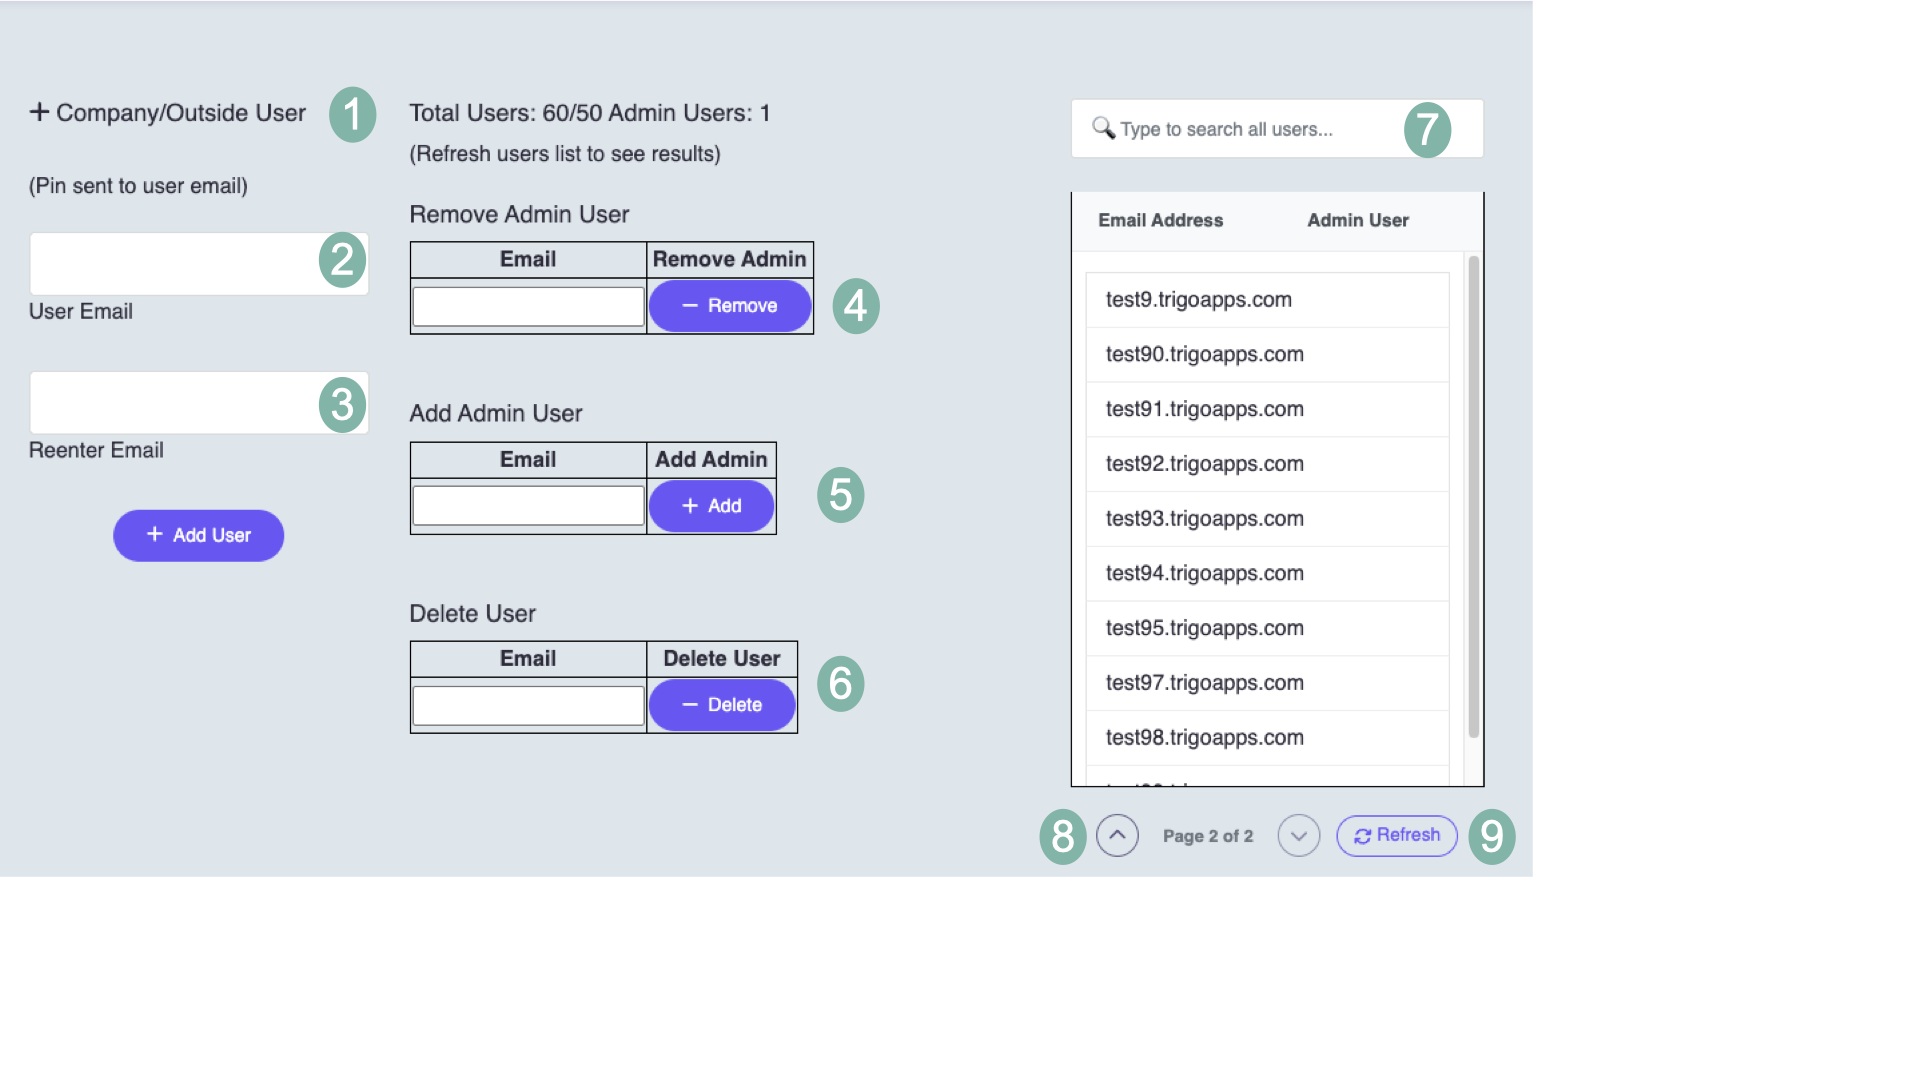
1 Add external user with emails outside your organization such as gmail or other company domain addresses.
2 Enter external email address.
3 Reenter the external email address to match and click "Add User". An email will be sent to the user with AccountKey and Pin.
4 To remove admin privileges from a user enter the email address here and click "Remove" to remove admin privilages.
5 To add Admin privileges enter the email address here and click "Add" to add admin privilages.
6 To delete a user enter the email address here and click "Delete" to remove the user.
7 Enter letters to search for current users.
8 Click on the up or down arrows to traverse the entire list.
9 Click here to refresh the list (check adds and deletes).
neuMoGo Builder Start 3.1
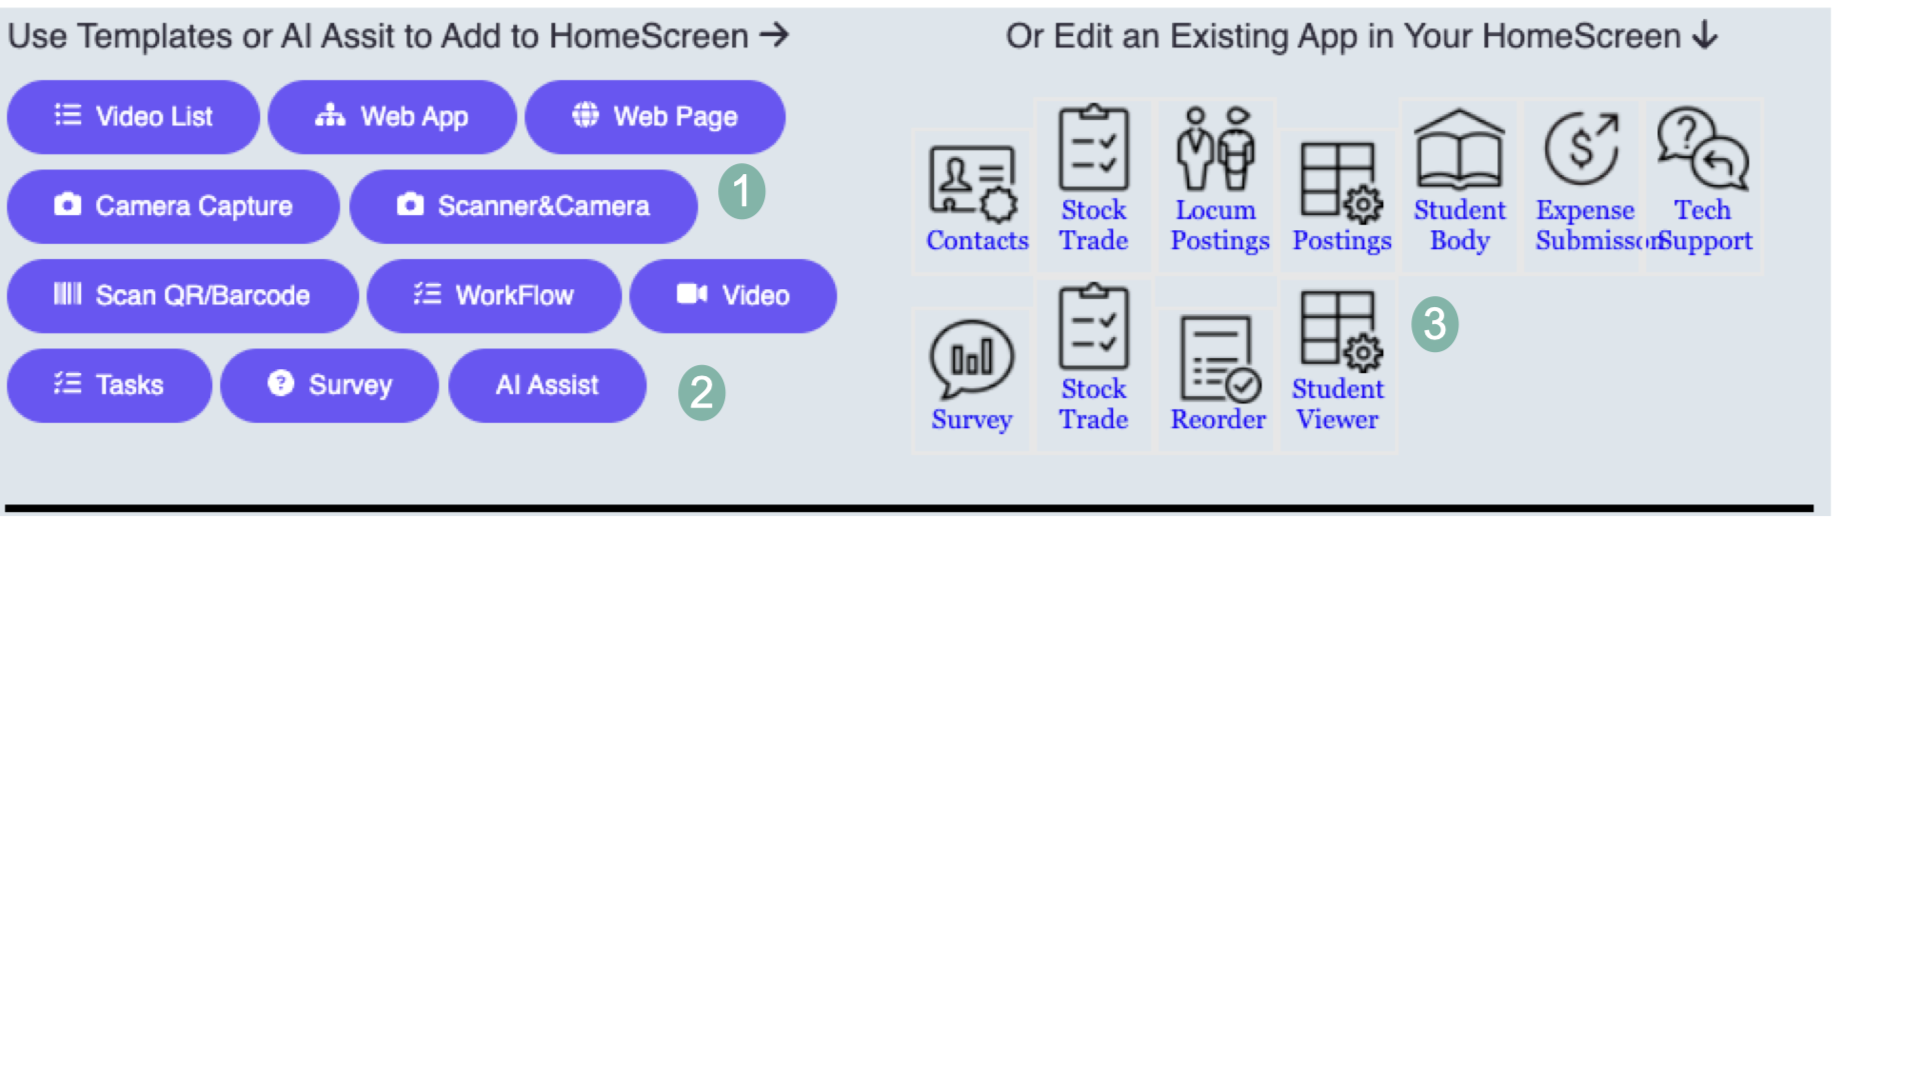
Select a Template, AI Assist or Existing Idea to Edit
1 neuMoGo comes with 10 templates to select from Video List to Survey.
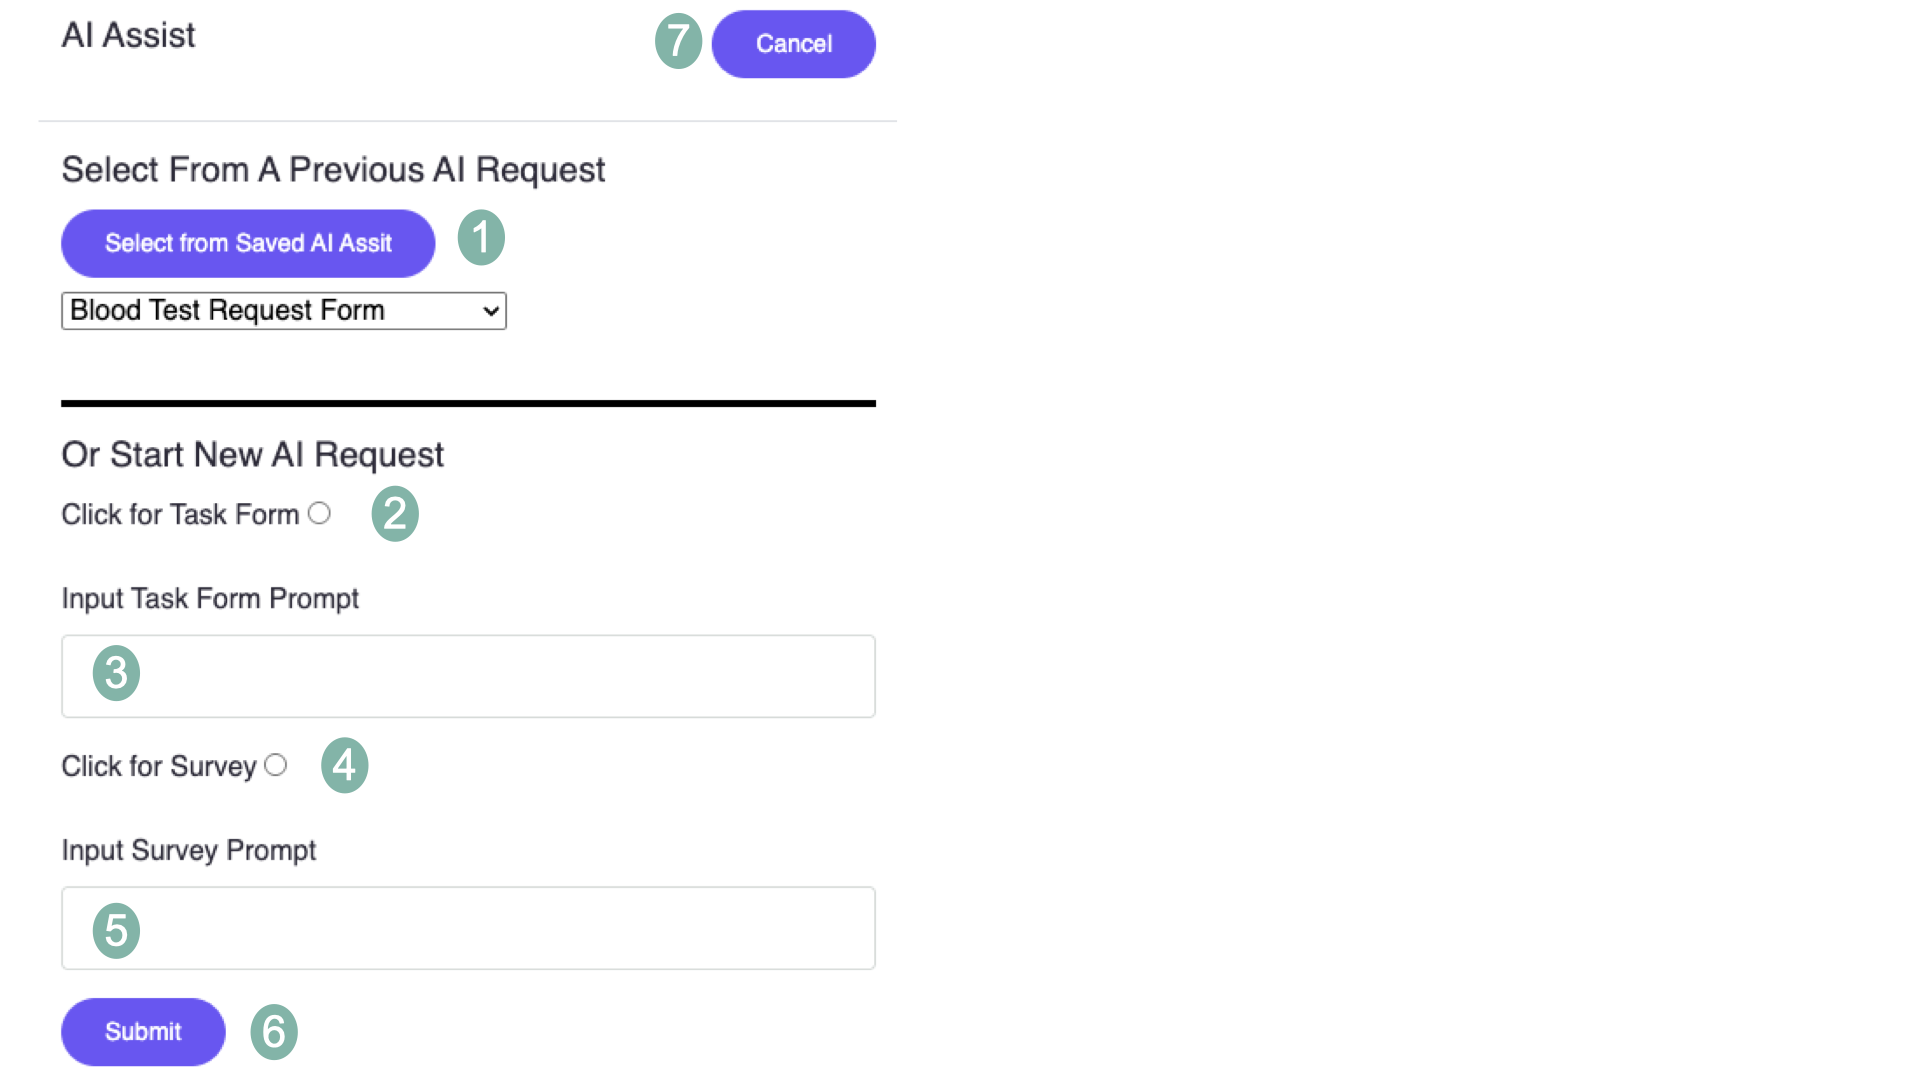
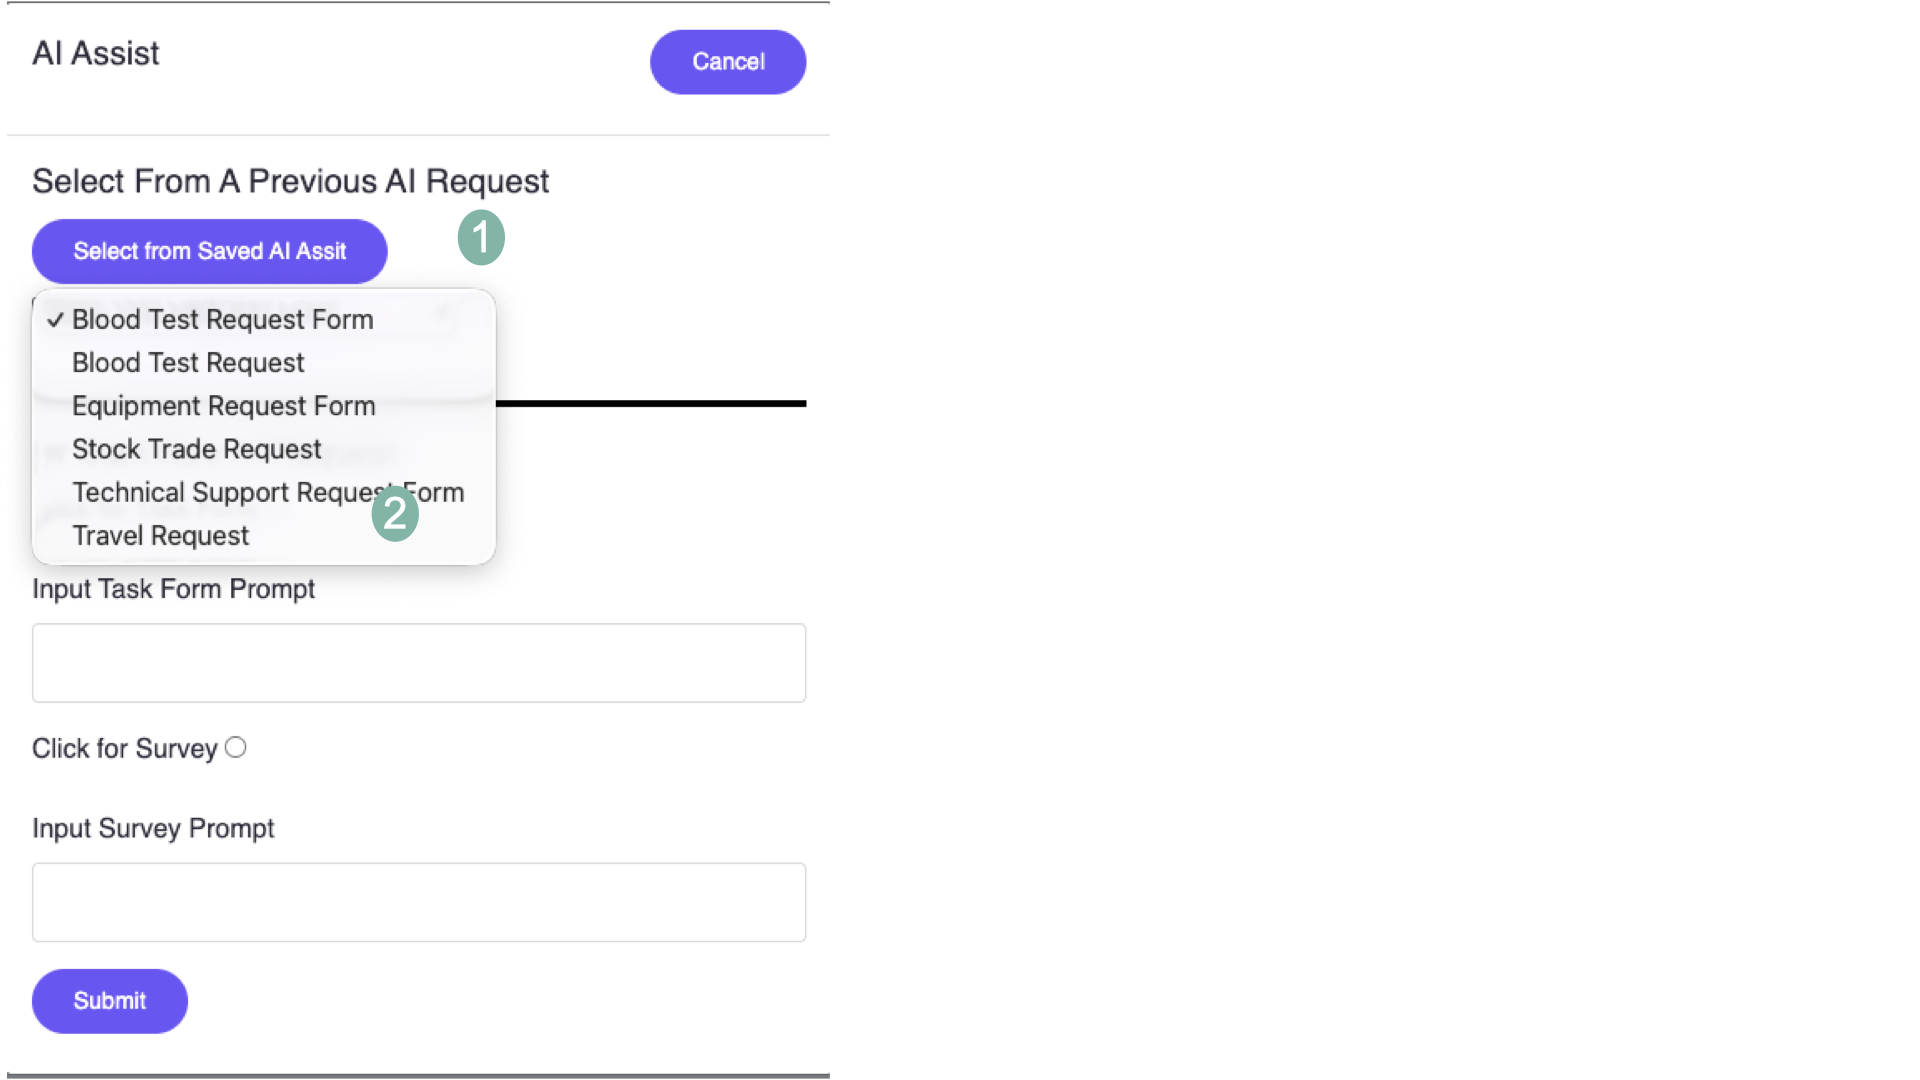
2 Enter your idea as a prompt to AI Assist and Gemini will return a form or survey.
3 Your existing ideas are displayed on the right with the icons you selected.
For Each Idea:
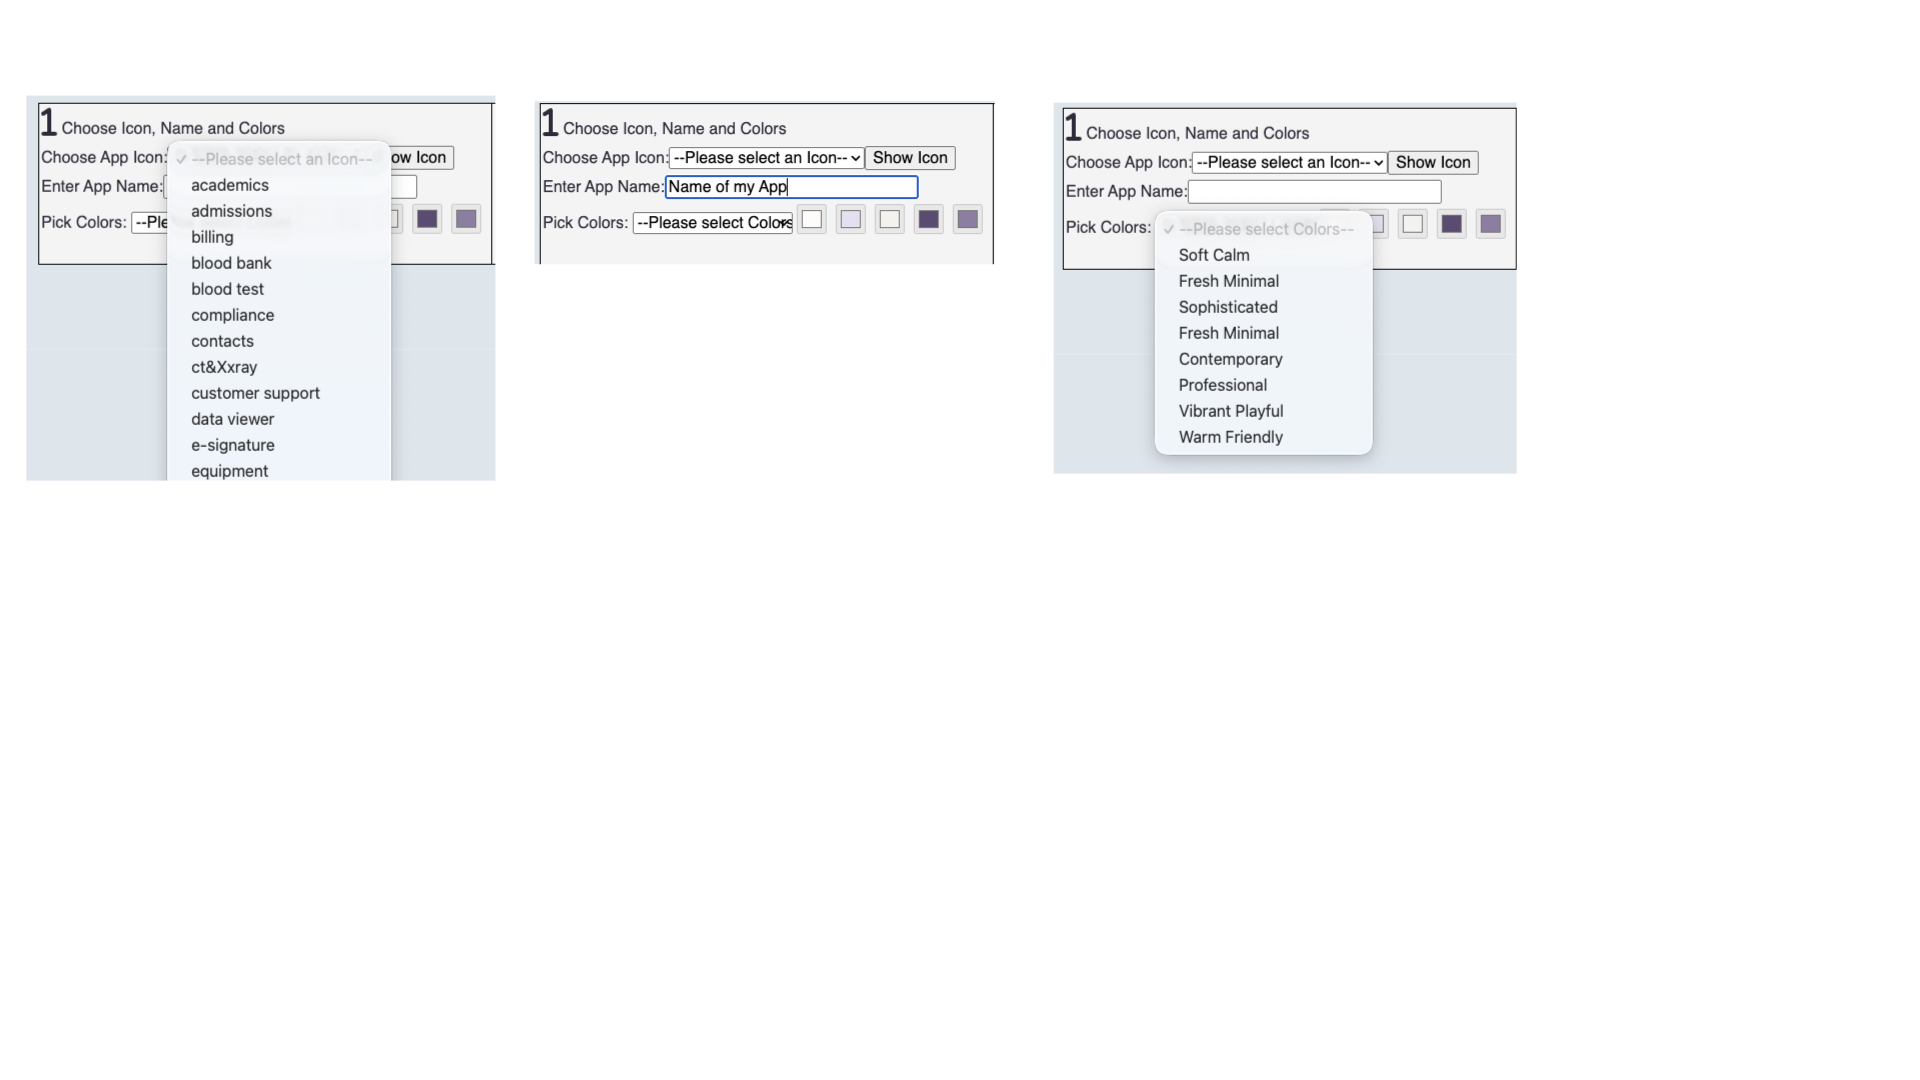
Select an Icon - Enter Name of Idea - Select Color Template
You can change all with Edit except for name. To change the name delete and readd under new name.
Video List 3.2
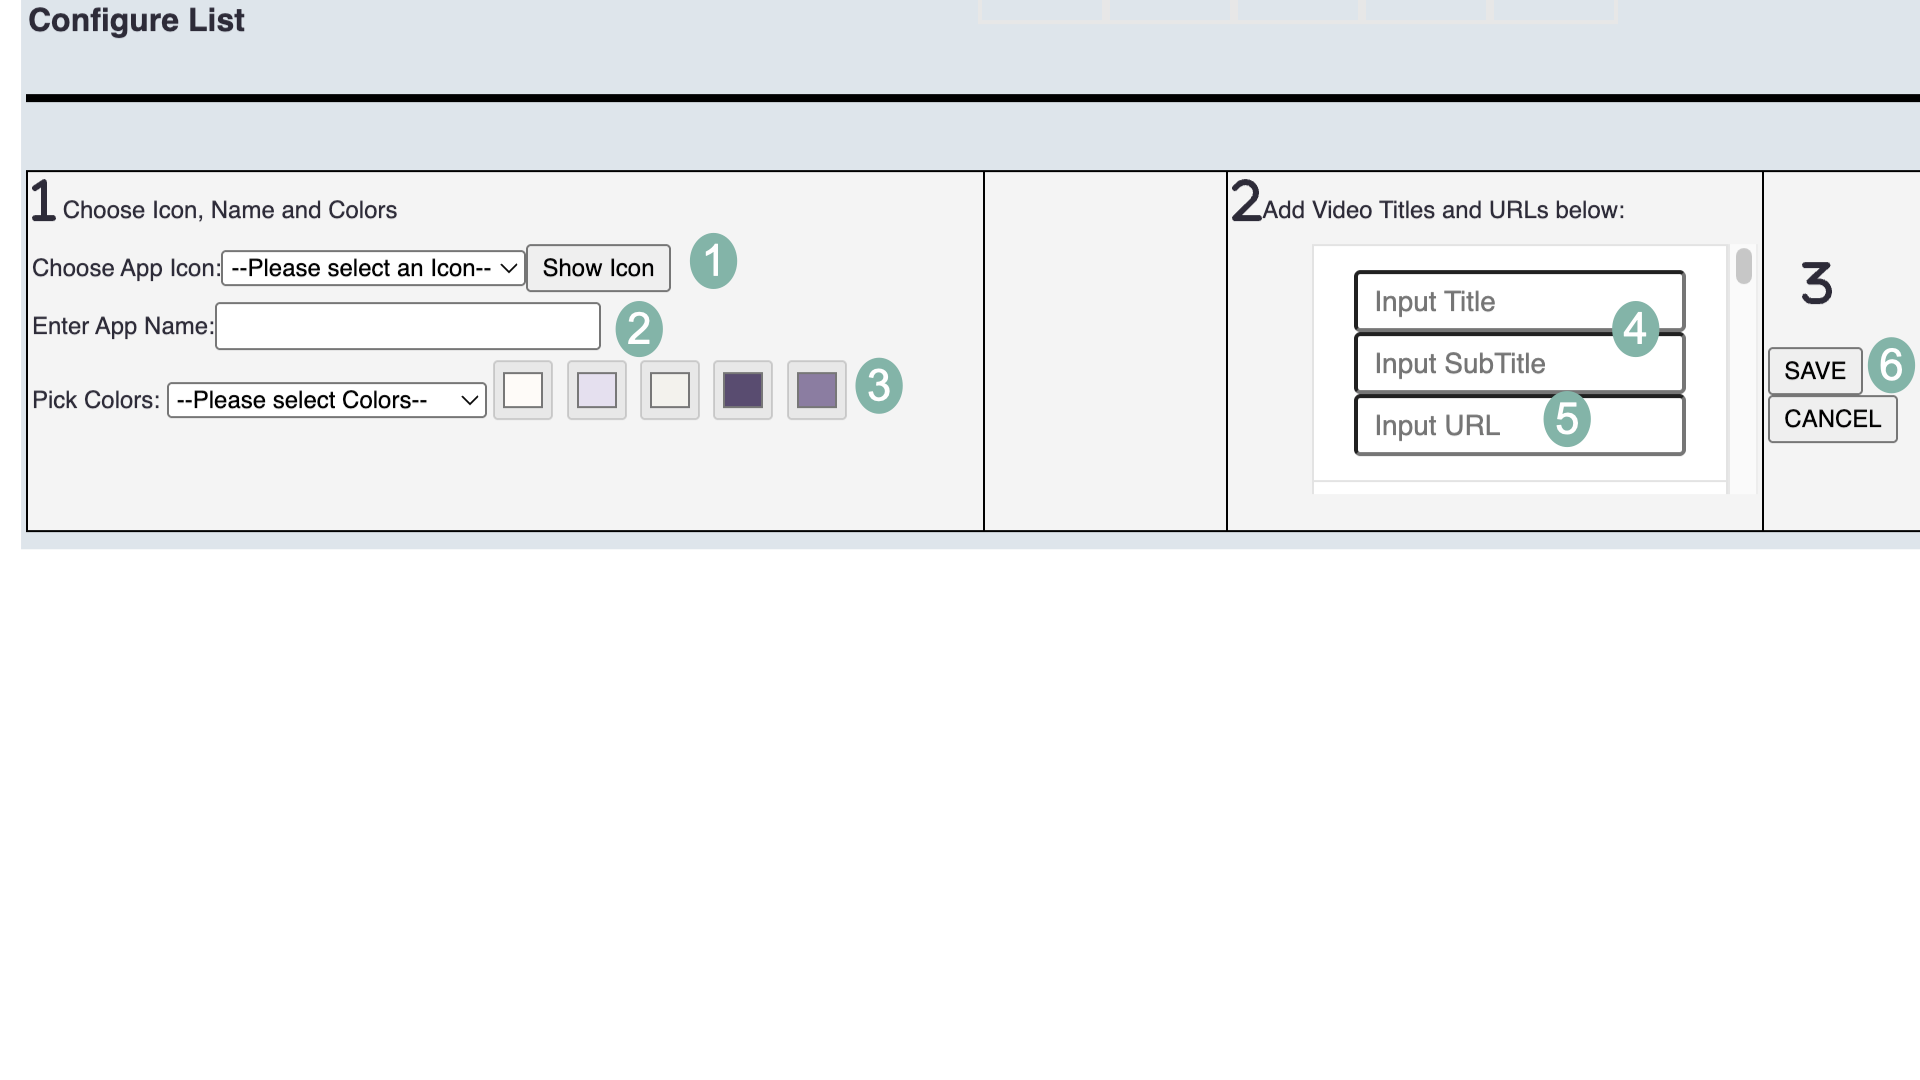
Video List is a collection of video URLs with titles you provide. It is displayed as cards with an
1 Select an Icon for your video List or use the "Video Playlist" icon.
2 Enter the name of your video list, like "company outing" or "training videos" .
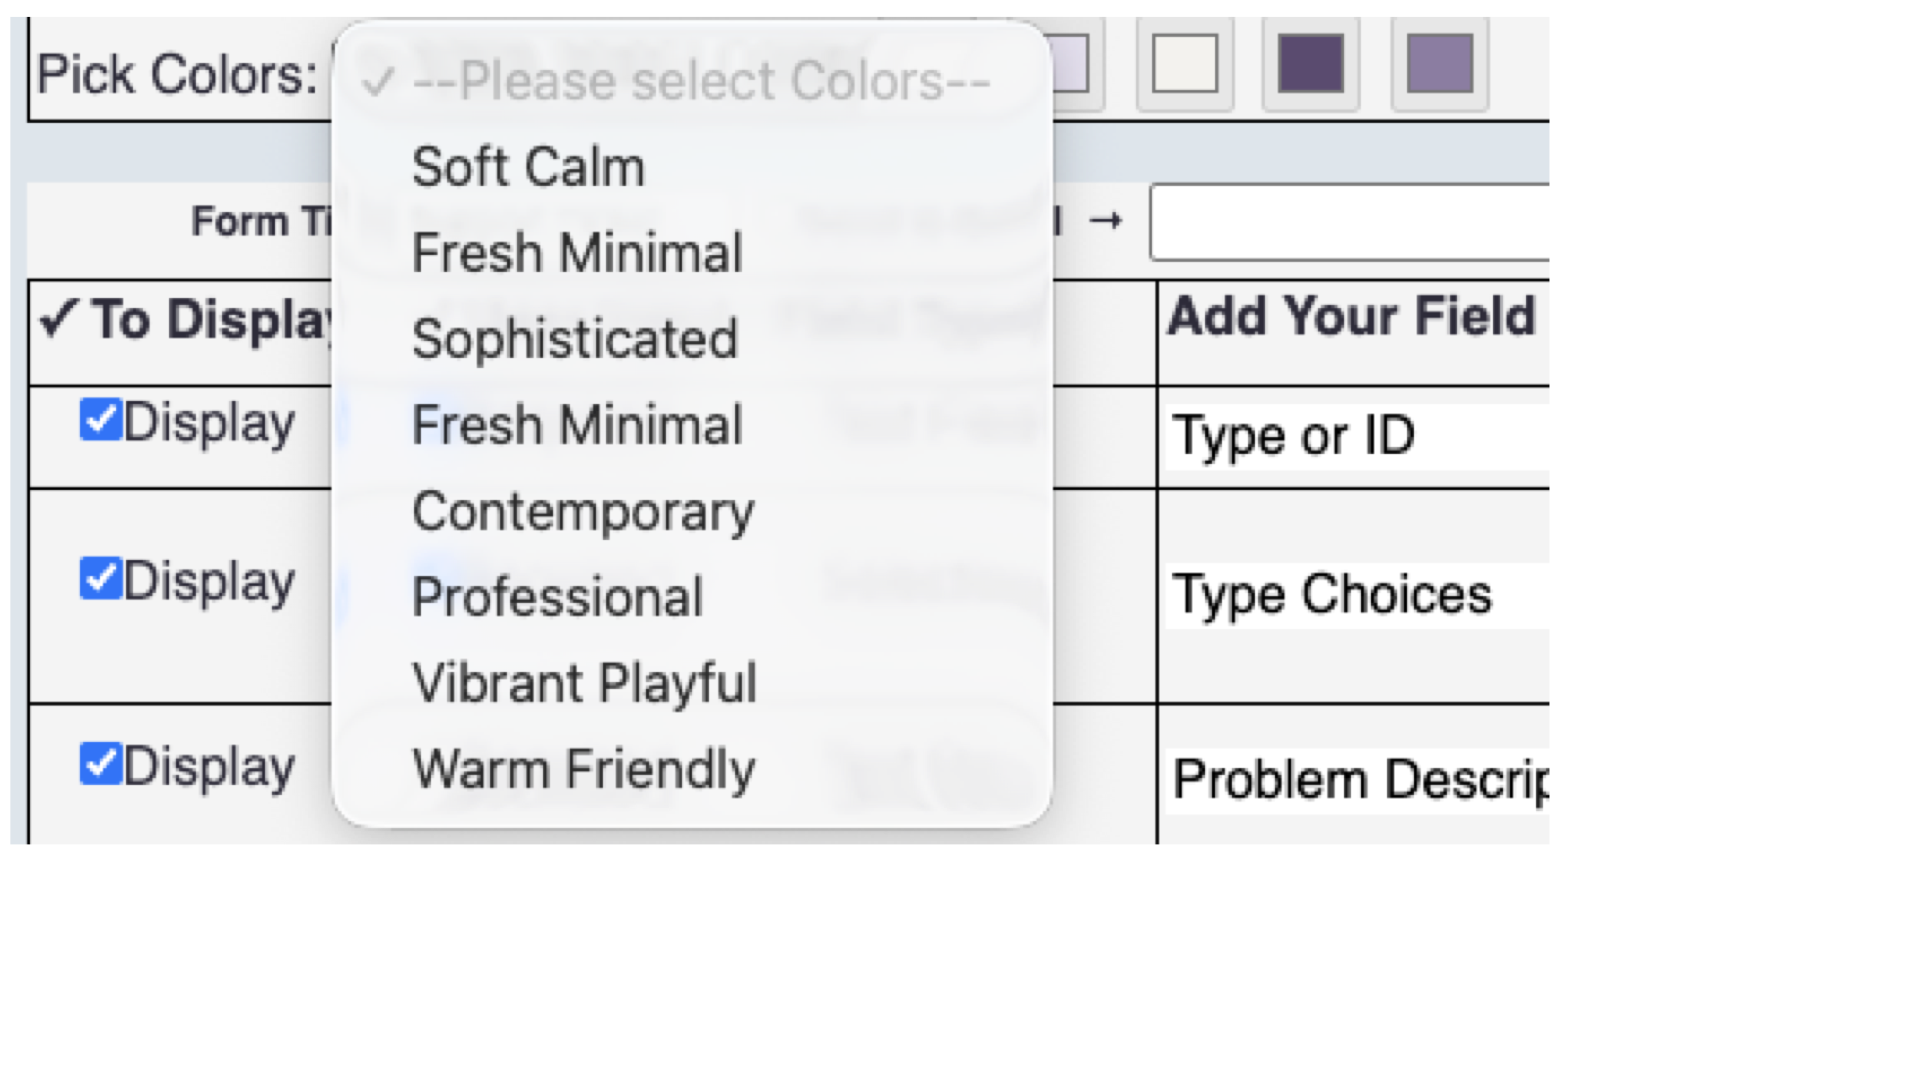
3 Select a color palette from the ones you selected in neuMoGo Colors.
4 Enter a title for each video and an optional subtitle.
5 Enter the URL for each video. neuMoGo will play mp4 videos made public on your storage or pubic YouTube videos.
6 Save or cancel the video list. If editing, you can also delete it.
neuMoGo will create a thumbnail image from a mp4 or Youtube video to display on the list panel.
WebApp 3.3
Select this type for an internal or external WebApp
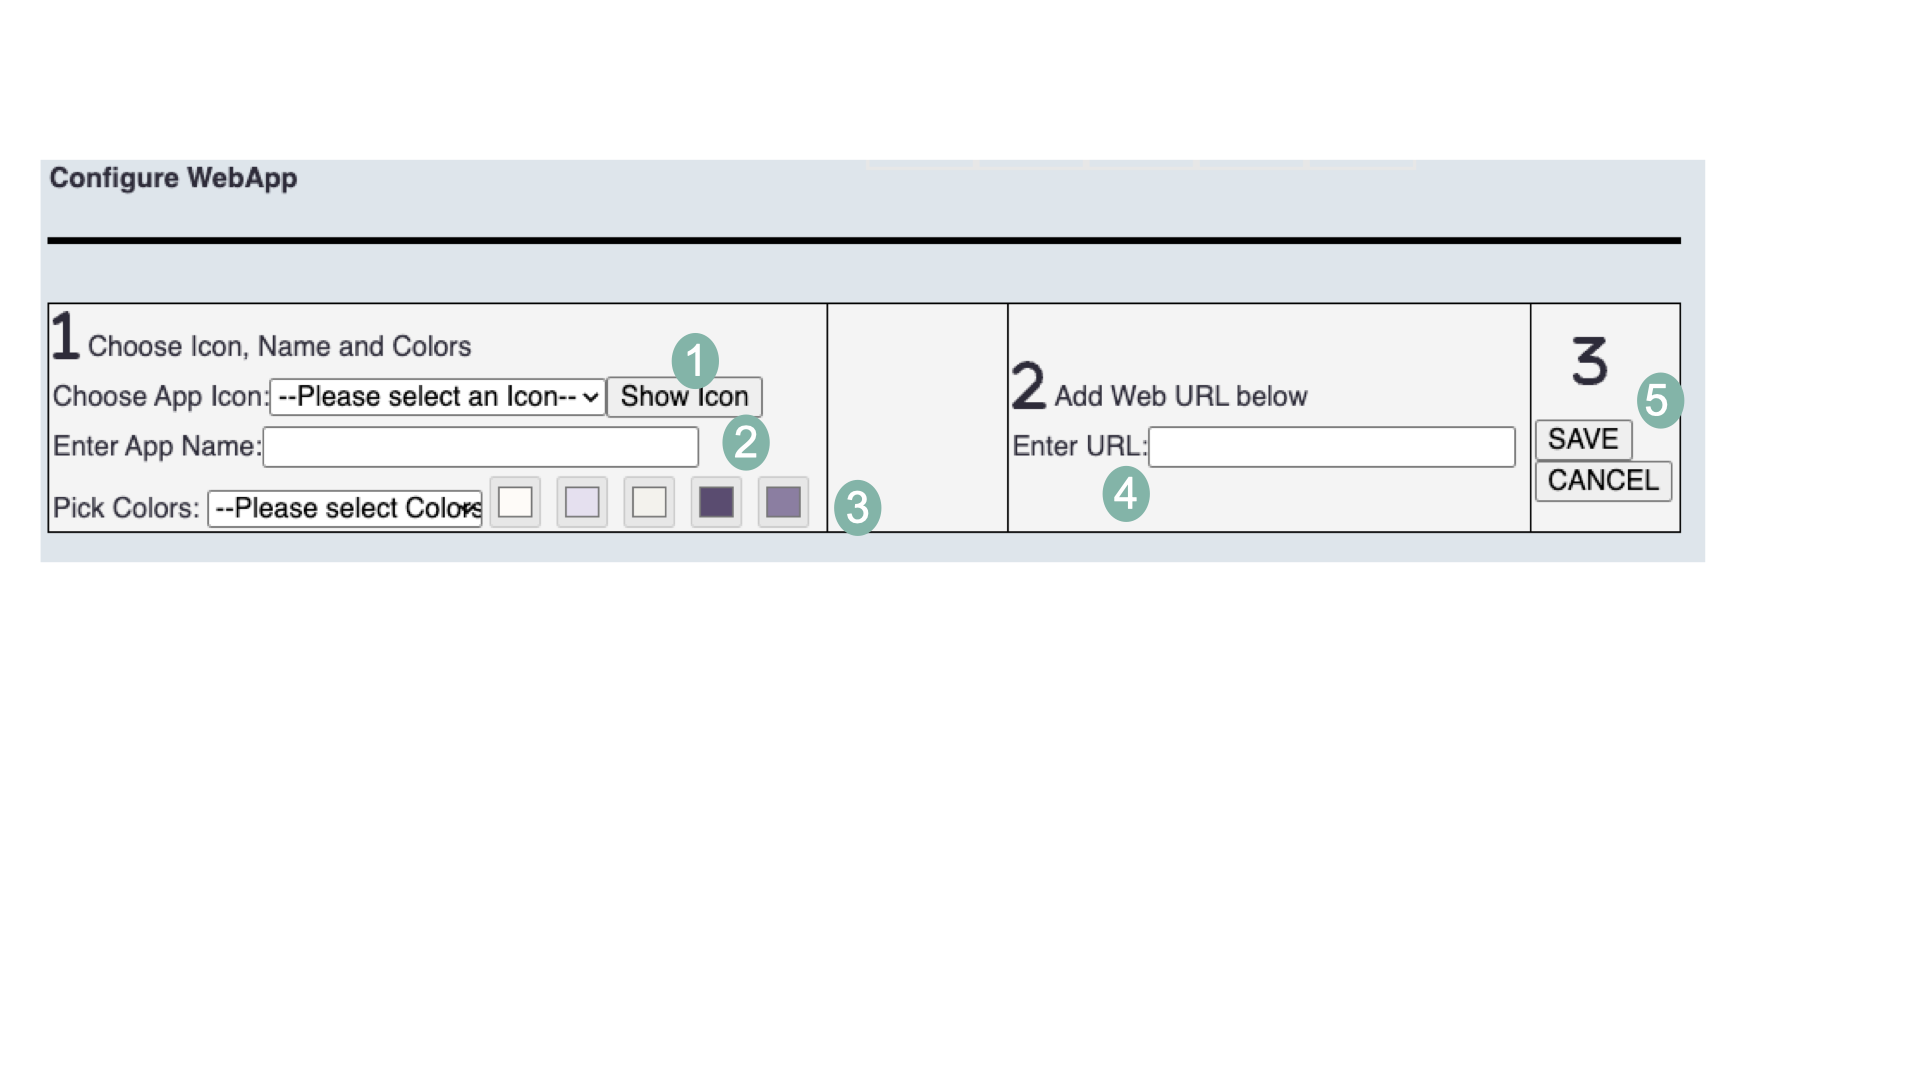
1 Select an icon from the drop-down list.
2 Enter the App name that will display on neuMoGo.
3 Select a color palette from ones you selected in neuMoGo Tools.
4 Enter the internal or external URL for the WebApp. Remember that the it must include a protocol "https://".
5 Save the App or Cancel. If editing an exisiting one you can also delte it.
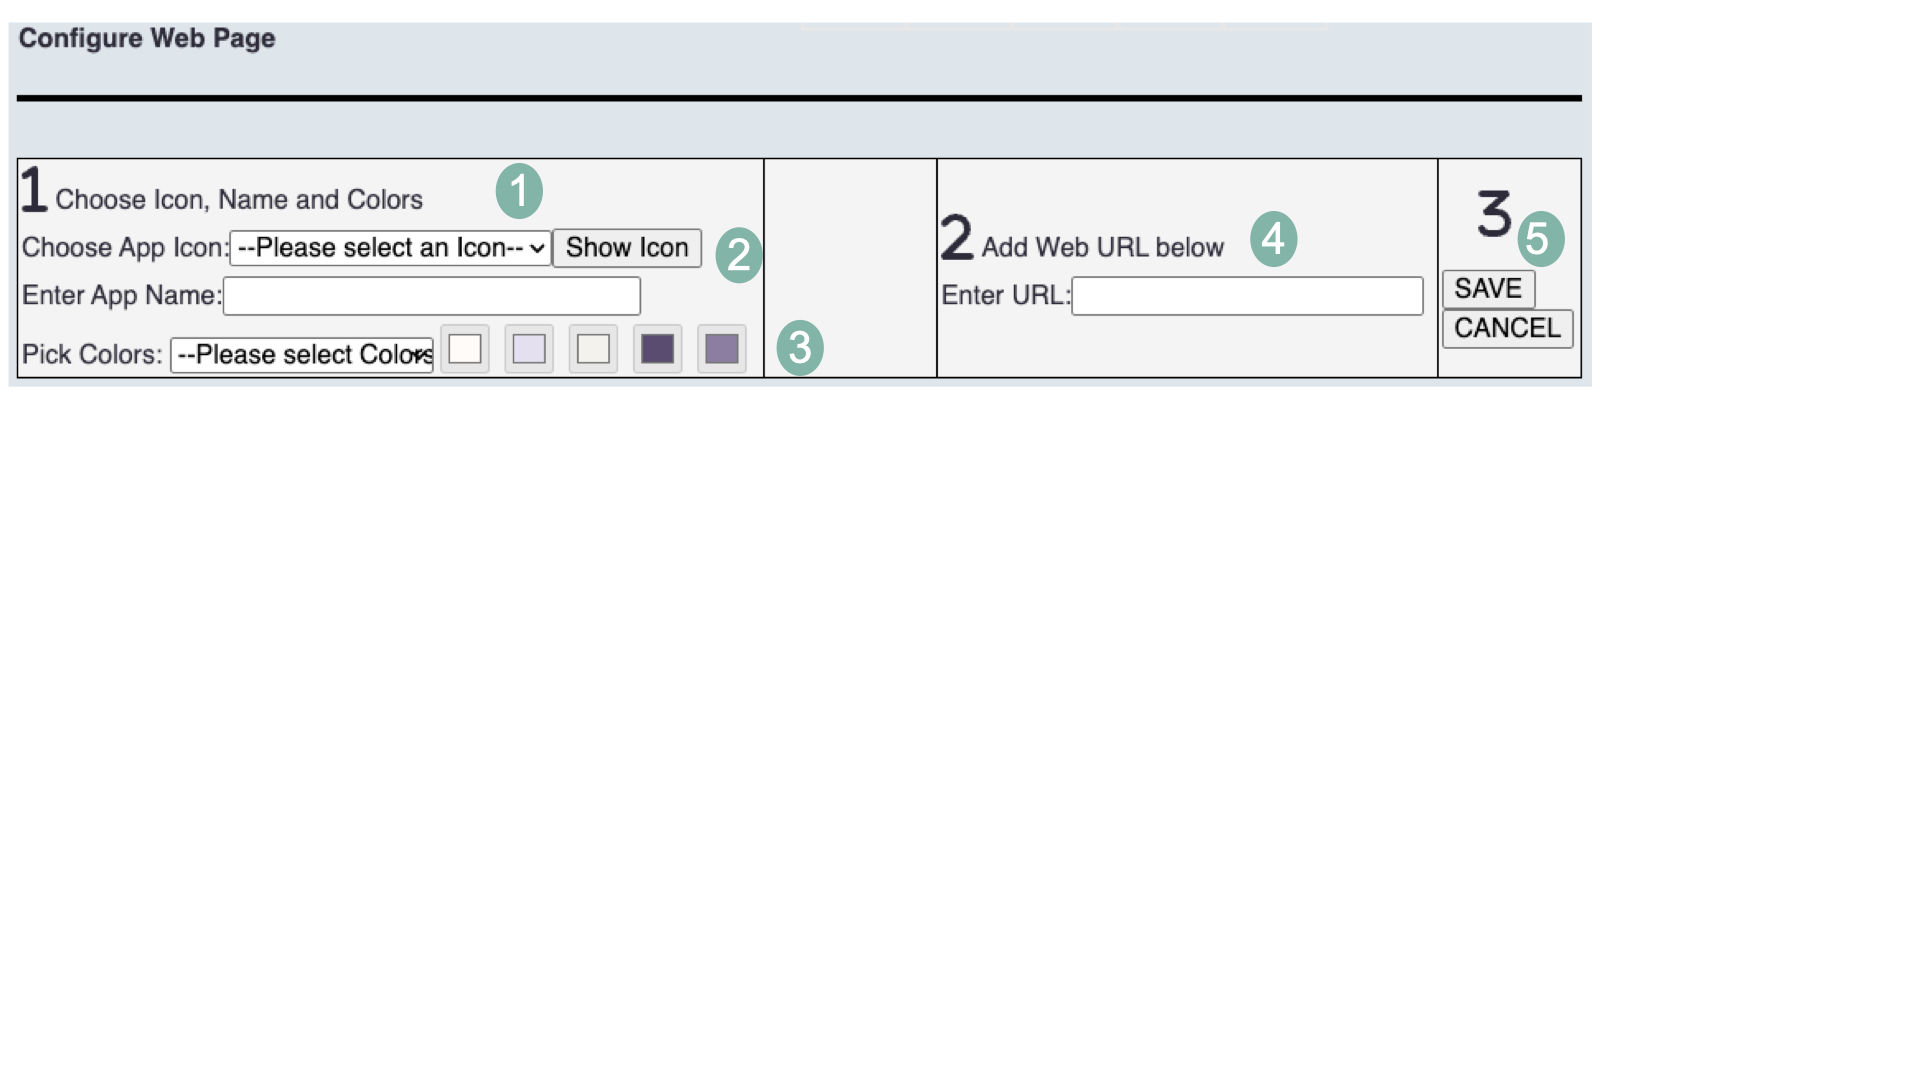
Web Page 3.4
Select this type for an internal or external Web Page
Caution: Do not attempt to upload videos in Web Pages.
1 Select an icon from the drop-down list.
2 Enter the App name that will display on neuMoGo.
3 Select a color palette from ones you selected in neuMoGo Tools.
4 Enter the internal or external URL for the Web Page. Remember that the it must include a protocol "https://".
5 Save the App or Cancel. If editing existing one you can also delete it.
Video 3.5
Select this type for an internal or external Video
1 Select an icon from the drop-down list.
2 Enter the App name that will display on neuMoGo.
3 Select a color palette from ones you selected in neuMoGo Tools.
4 Enter the internal or external URL for Video. Remember that the it must include a protocol "https://".
5 Save the App or Cancel. If editing existing one you can also delete it.
Form Types and Fields 3.6
Templates are provided for many types of forms with combinations of field types such as Scanner, Camera Capture, Date field with calendar, Selection Choices, Text Field, Text Box, Modifiers, and Rating Stars.
Forms include combinations of field types and options listed below:
| Camera |
A Camera item presents the Camera to take a picture to store with the Form. The user is asked for permission before showing the camera. |
| QR/Barcode Scanner |
Use this field to scan a Bar Code or QR Code to complete the text field below the item. |
| Text Field |
A Text Field for the user to enter text. |
| Text Box |
This is Text Box for free form text. |
| Choices |
A Choice Item displays a Picker for the user to select what applies. You must supply a comma delimited list of choices in the Choices/Responses box. |
| Date Selector |
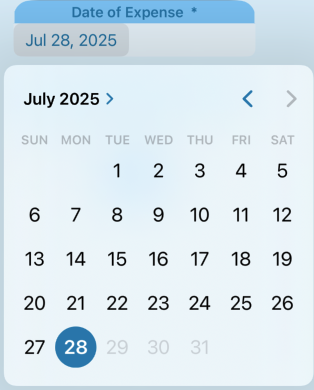
Date displays a calendar to the user to select a date (90 days forward and backward date range). |
| Survey |
Use a Survey to present survey questions. Add a comma delimited list of Survey responses for each question. |
| Rating Stars |
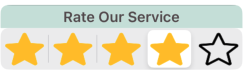
A Rating Item shows a group of 5 stars for the user to select for rating. |
| Modifier |
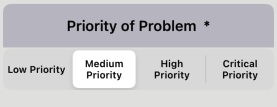
A modifier for a Form such as Priority for a help desk ticket. You must supply a comma delimited list of not more than 4 modifiers in the Choices/Response box. |
| Display |
Template forms and those generated by AI have a complete list of fields. Check this to included or uncheck to excluded the item from display to user. |
| Required |
Check this if the user is required to complete the Item to submit the form. An asterisk (*) will appear with this item in the Form and an error message will prompt the user to complete this item. |
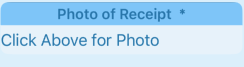
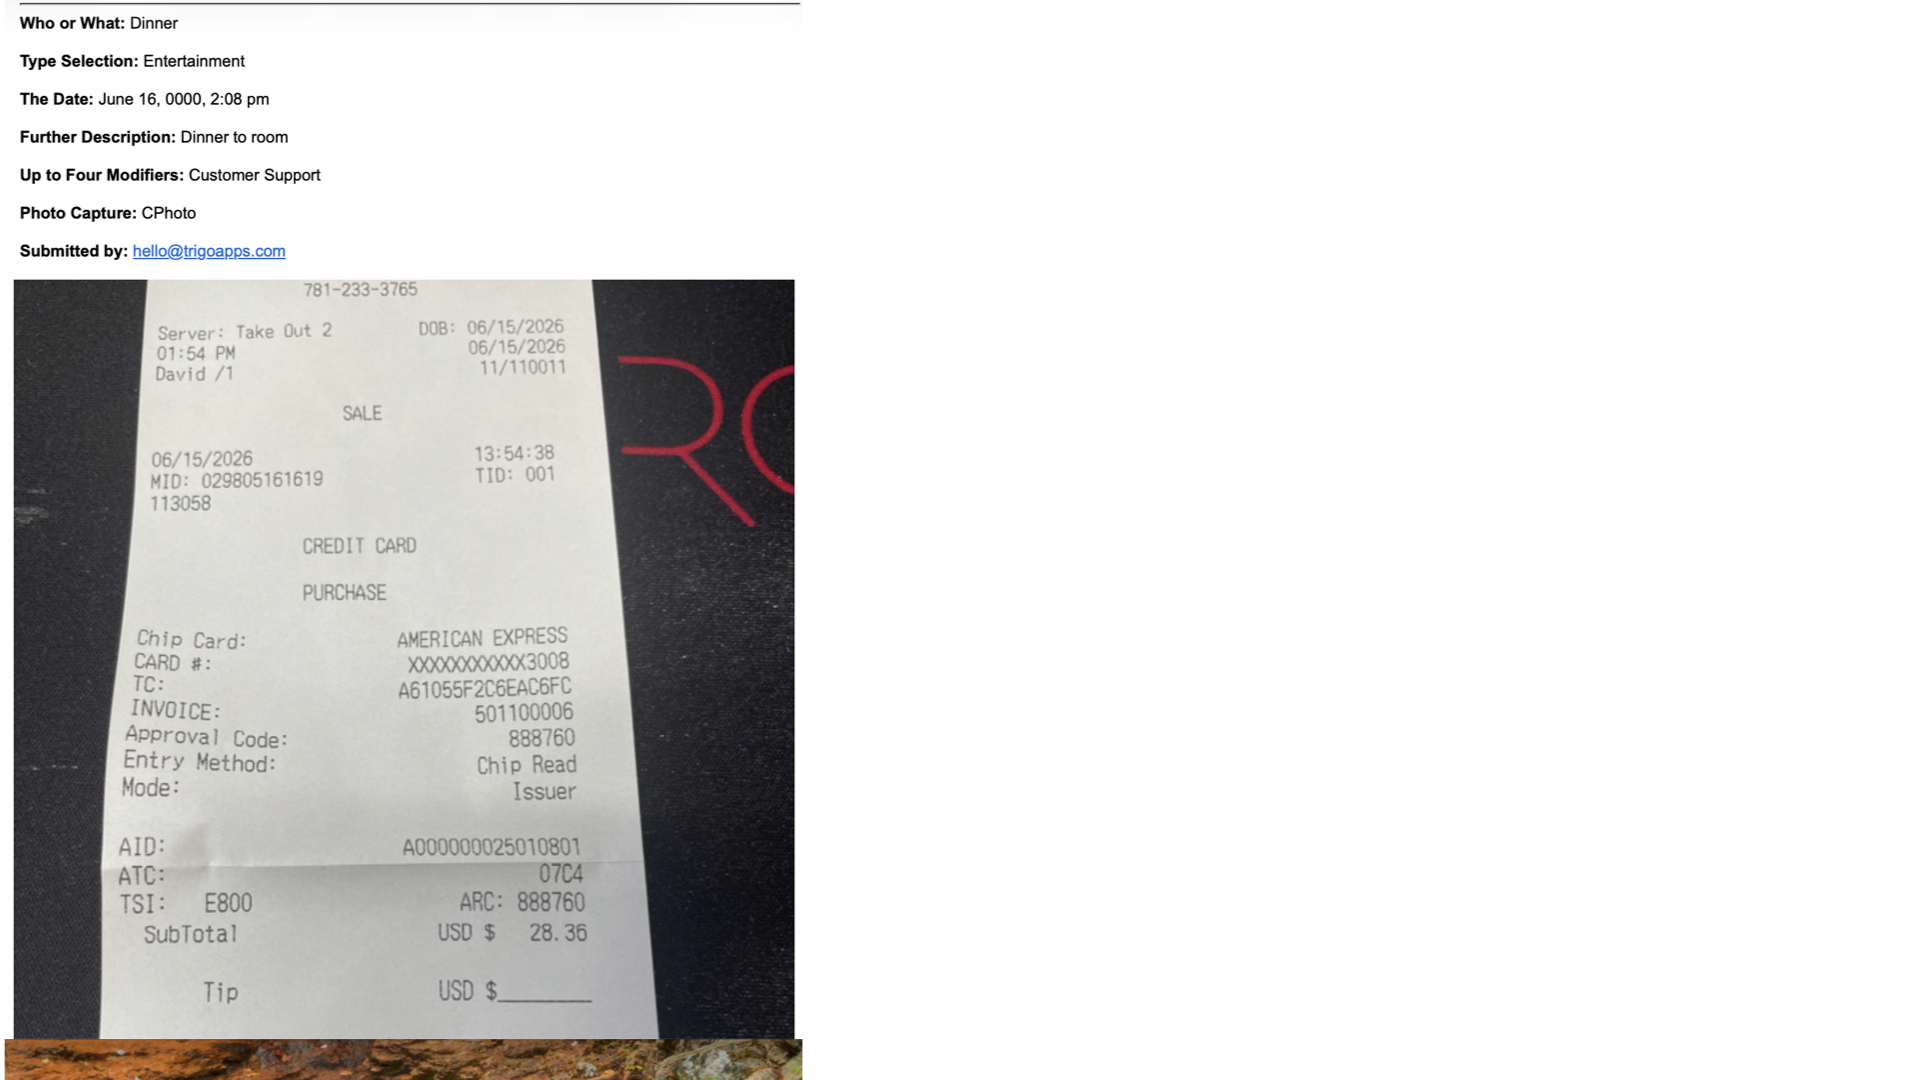
This is the what a Camera item looks like in your neuMoGo Form. You can check the Req (Required input) check box to require a camera photo from the user.
QR/Bar Code Scan Item
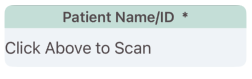
This is the what a QR/Bar Code Scanning item looks like in your neuMoGo Form.
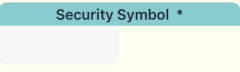
Text Field Item
This is the what a Text Field looks like in your neuMoGo Form.
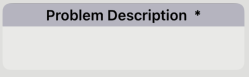
Text Box Item
This is the what a Text Box looks like in your neuMoGo Form.
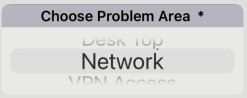
Choice Picker Field Item
This is the what a Choice (Picker) Item looks like in your neuMoGo Form.
Date (Calendar) Item
This is the what a Date (Calendar) Item looks like in your neuMoGo Form.
Survey Item
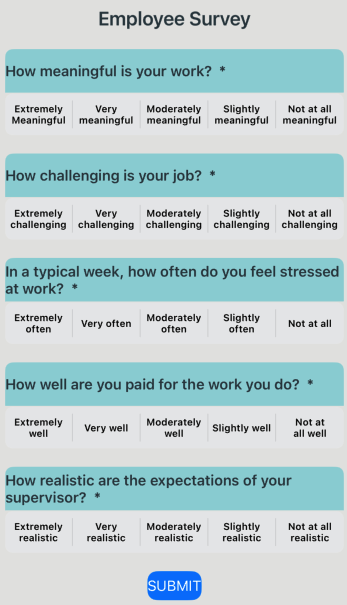
This is the what 5 Survey Items looks like in your neuMoGo Form. Use the reporting features of neuMoGo to show the graphic results of your Survey (Section 7.6).
Rating Stars Item
This is the what Rate Items looks like in your neuMoGo Form.
Modifier Item
This is the what a Modifier Items looks like in your neuMoGo form.
Completing Forms 3.7
This Section Covers Completing and Customizing the Main Template Types of Forms
Scanner and Camera Capture
This Form has a QR/Bare Code Scanner.
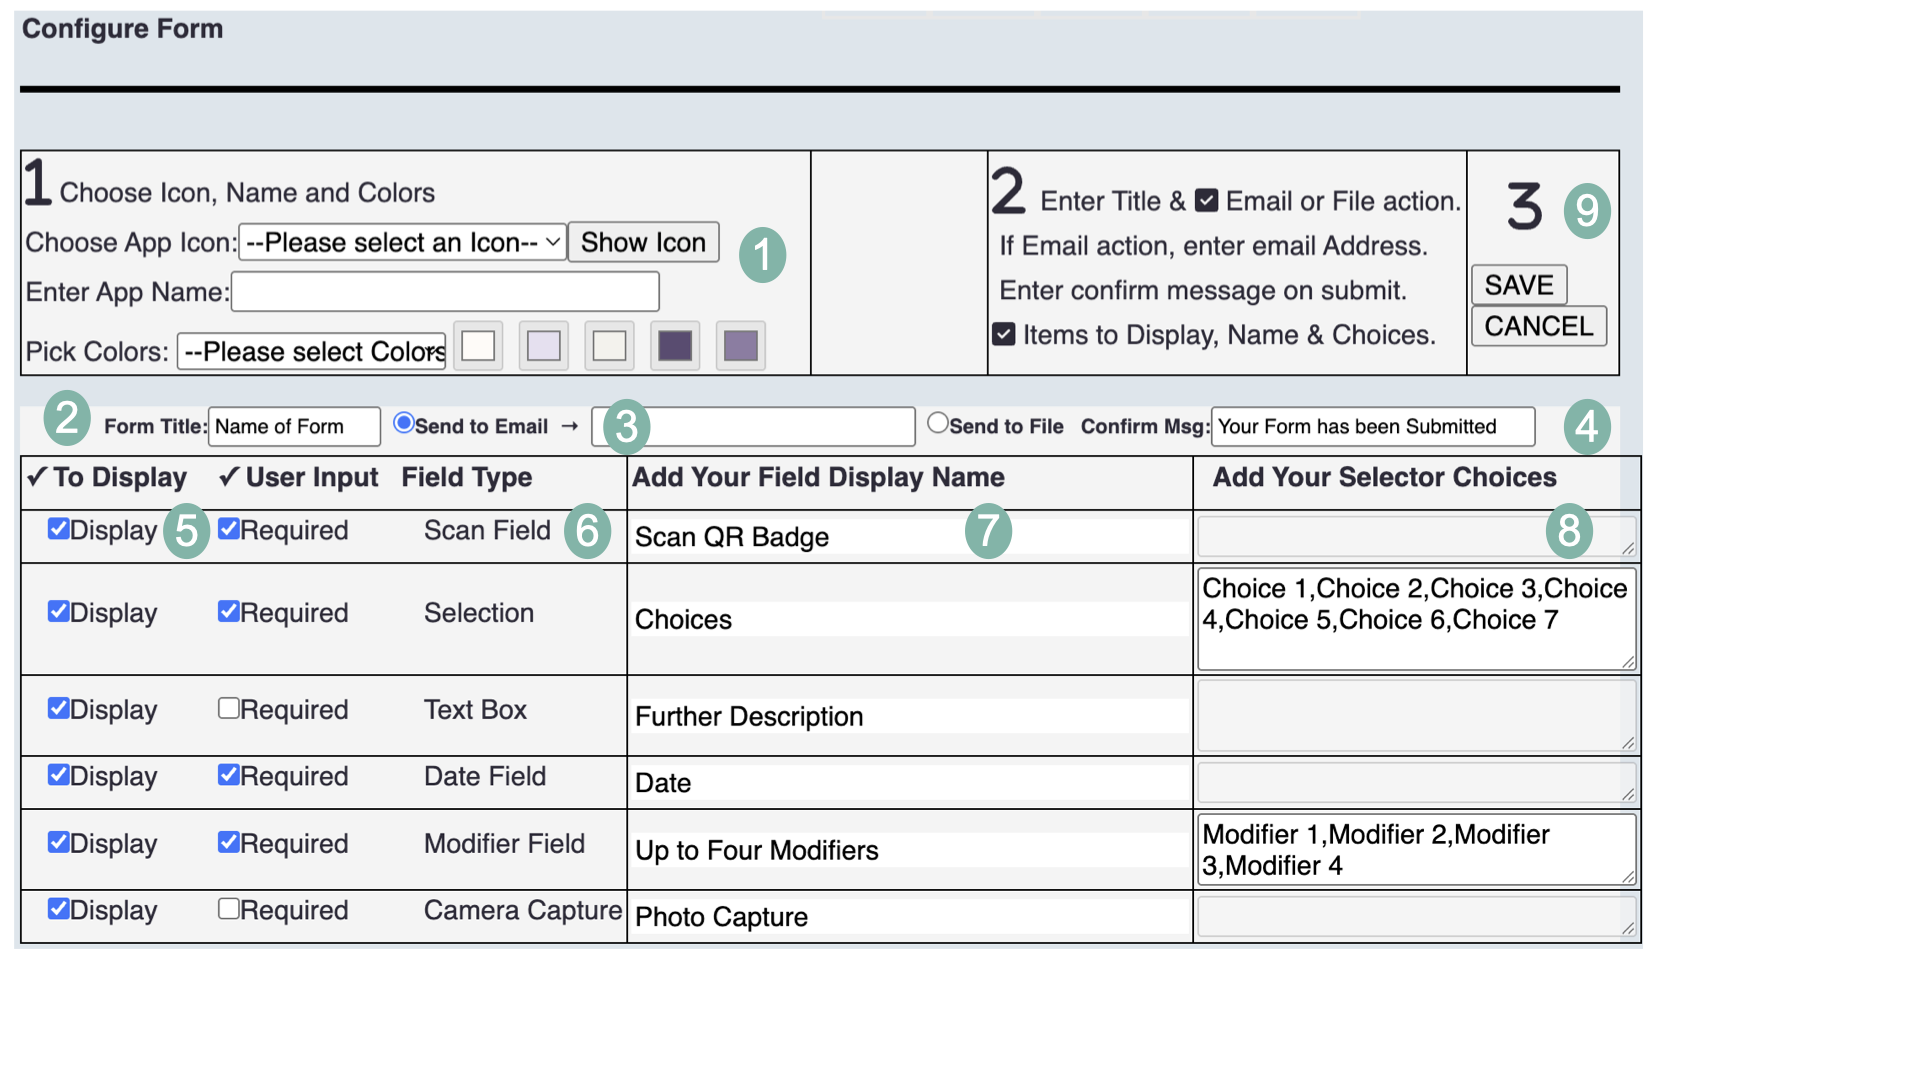
1 Select the app icon for the HomeScreen, enter app name and select a color palette.
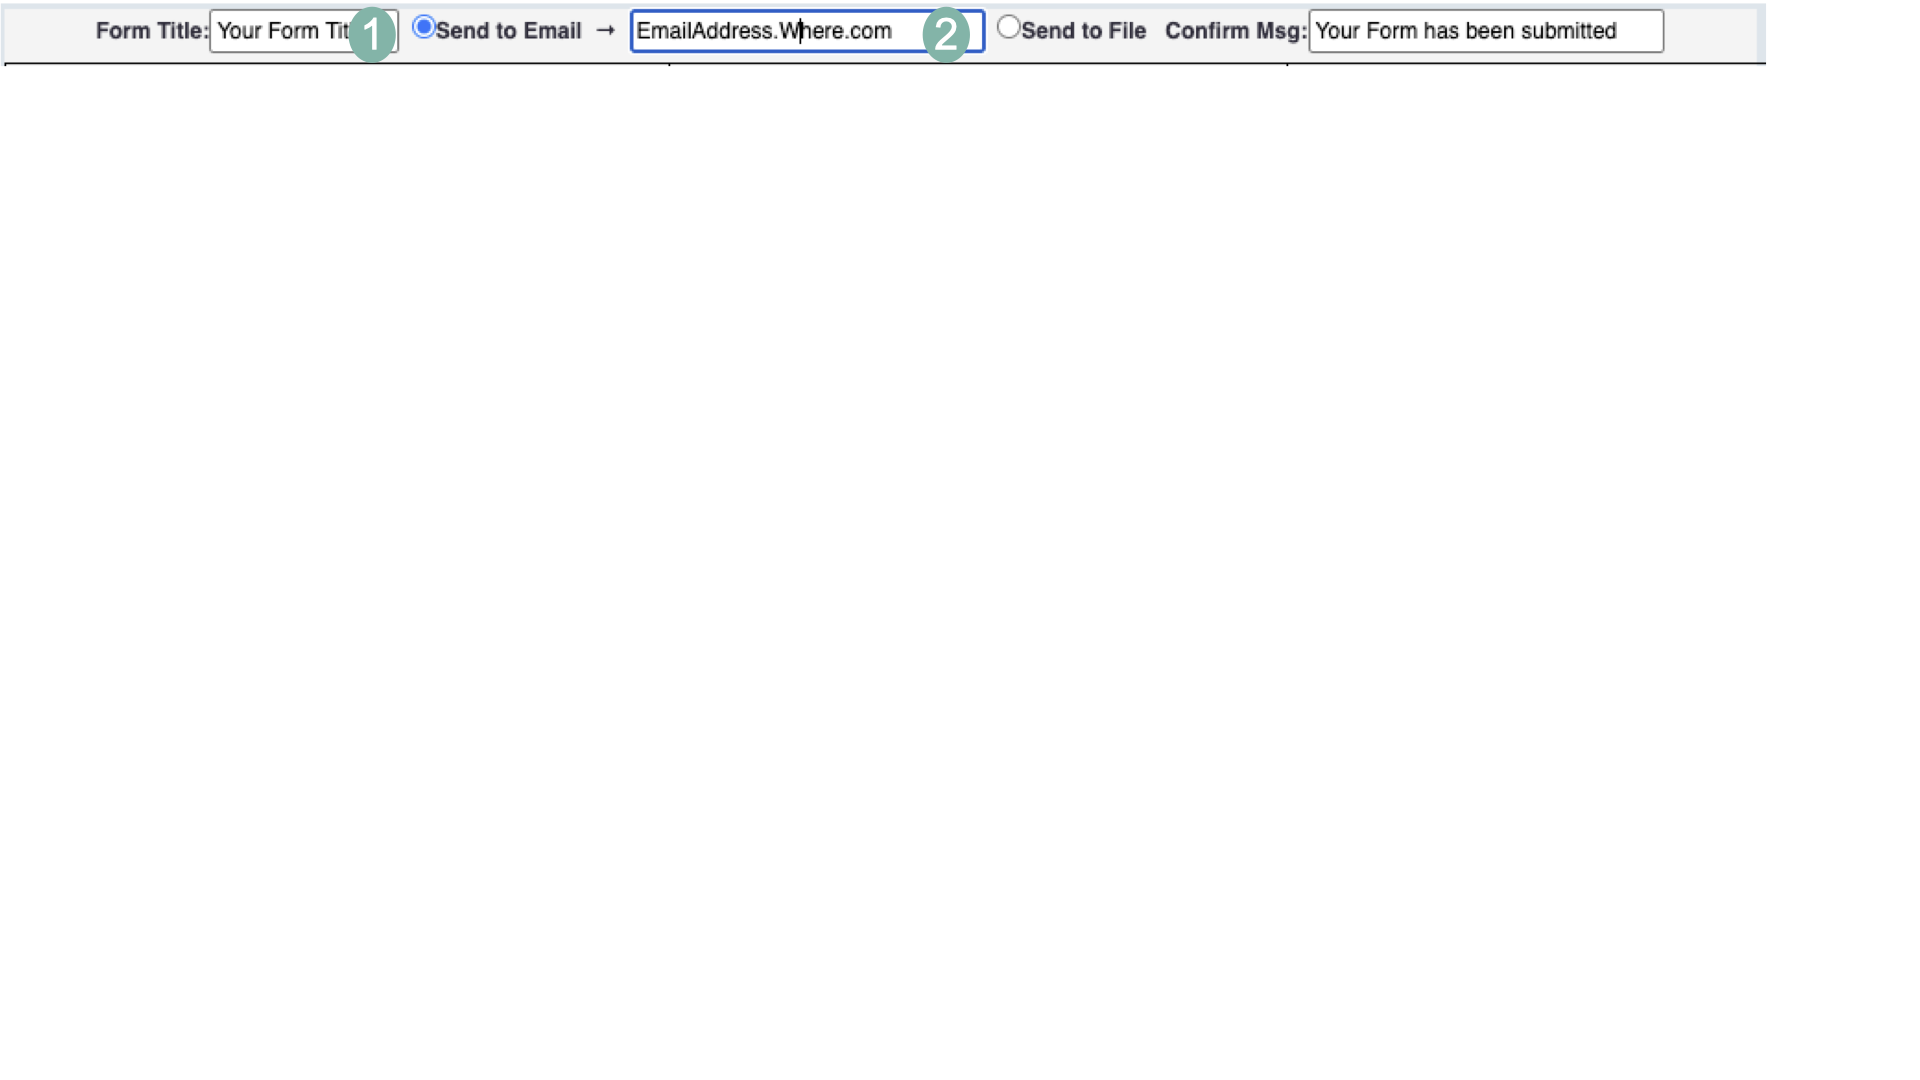
2 Enter the title to appear at the top of the form. Once saved, app name and title cannot be changed.
3 All forms with a camera capture item can only go to email. Enter target email address.
4 Enter the message you want for the pop up after form submission. Can include contact phone number.
5 Check or uncheck Display to include or exclude item from form, and Required on not required for submission.
6 This is an informative display of the field type.
7 Enter the field label you want to display on the form.
8 Enter comma delimited choices or modifiers. Best to use a note pad to enter and then paste it here.
9 Save or Cancel. If editing a form, you can also delete it.
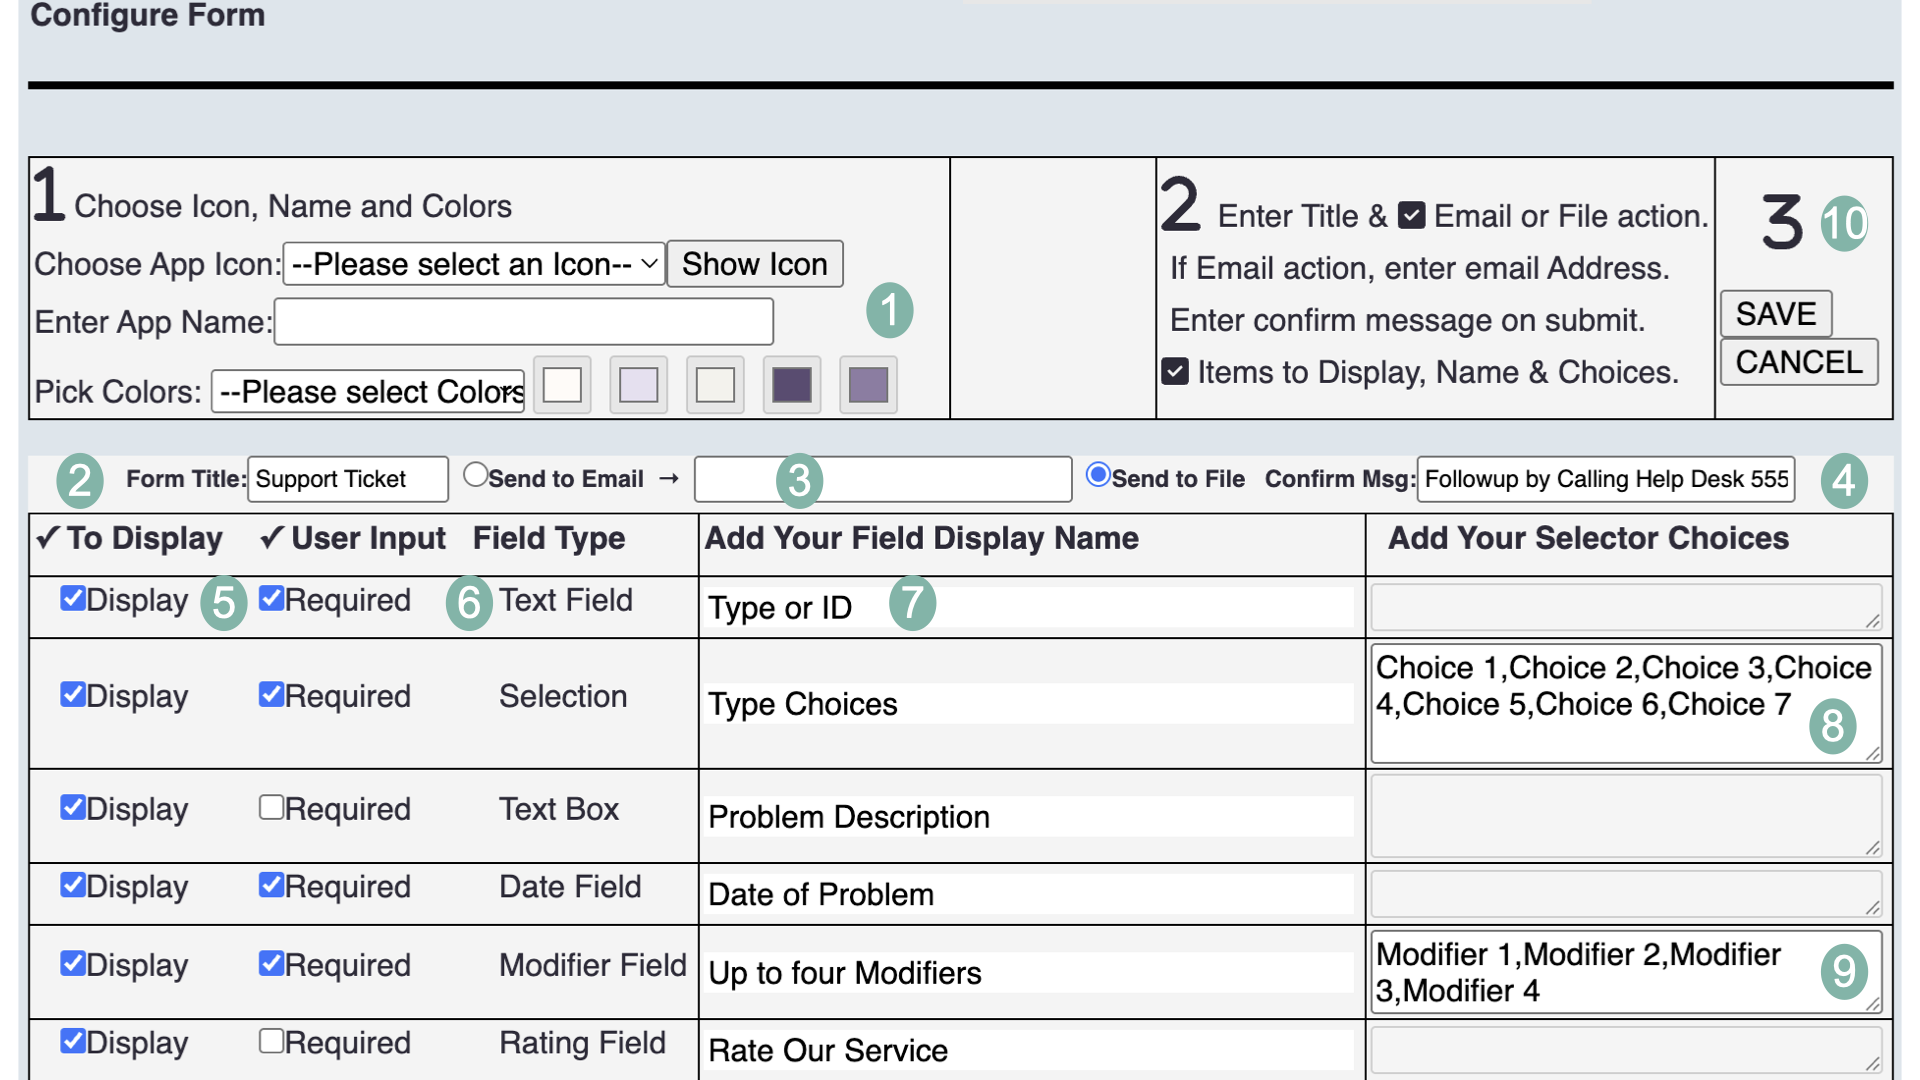
Task Forms
This Form is used for general workday tasks.
1 Select the app icon for the HomeScreen, enter app name and select a color palette.
2 Enter the title to appear at the top of the form. Once saved, app name and title cannot be changed.
3 Task forms can output to email address or a file for interface with backend system or download as CSV file.
4 Enter the message you want for the pop up after form submission. Can include contact phone number.
5 Check or uncheck Display to include or exclude item from form, and Required or not Required for submission.
6 This is an informative display of field type.
7 Enter the field label you want to display on the form.
8 Enter comma delimited choices for Selections. Best to use a note pad to enter and then paste it here.
9 Enter comma delimited choices for up to 4 modifiers.
10 Save or Cancel. If editing a form, you can also delete it.
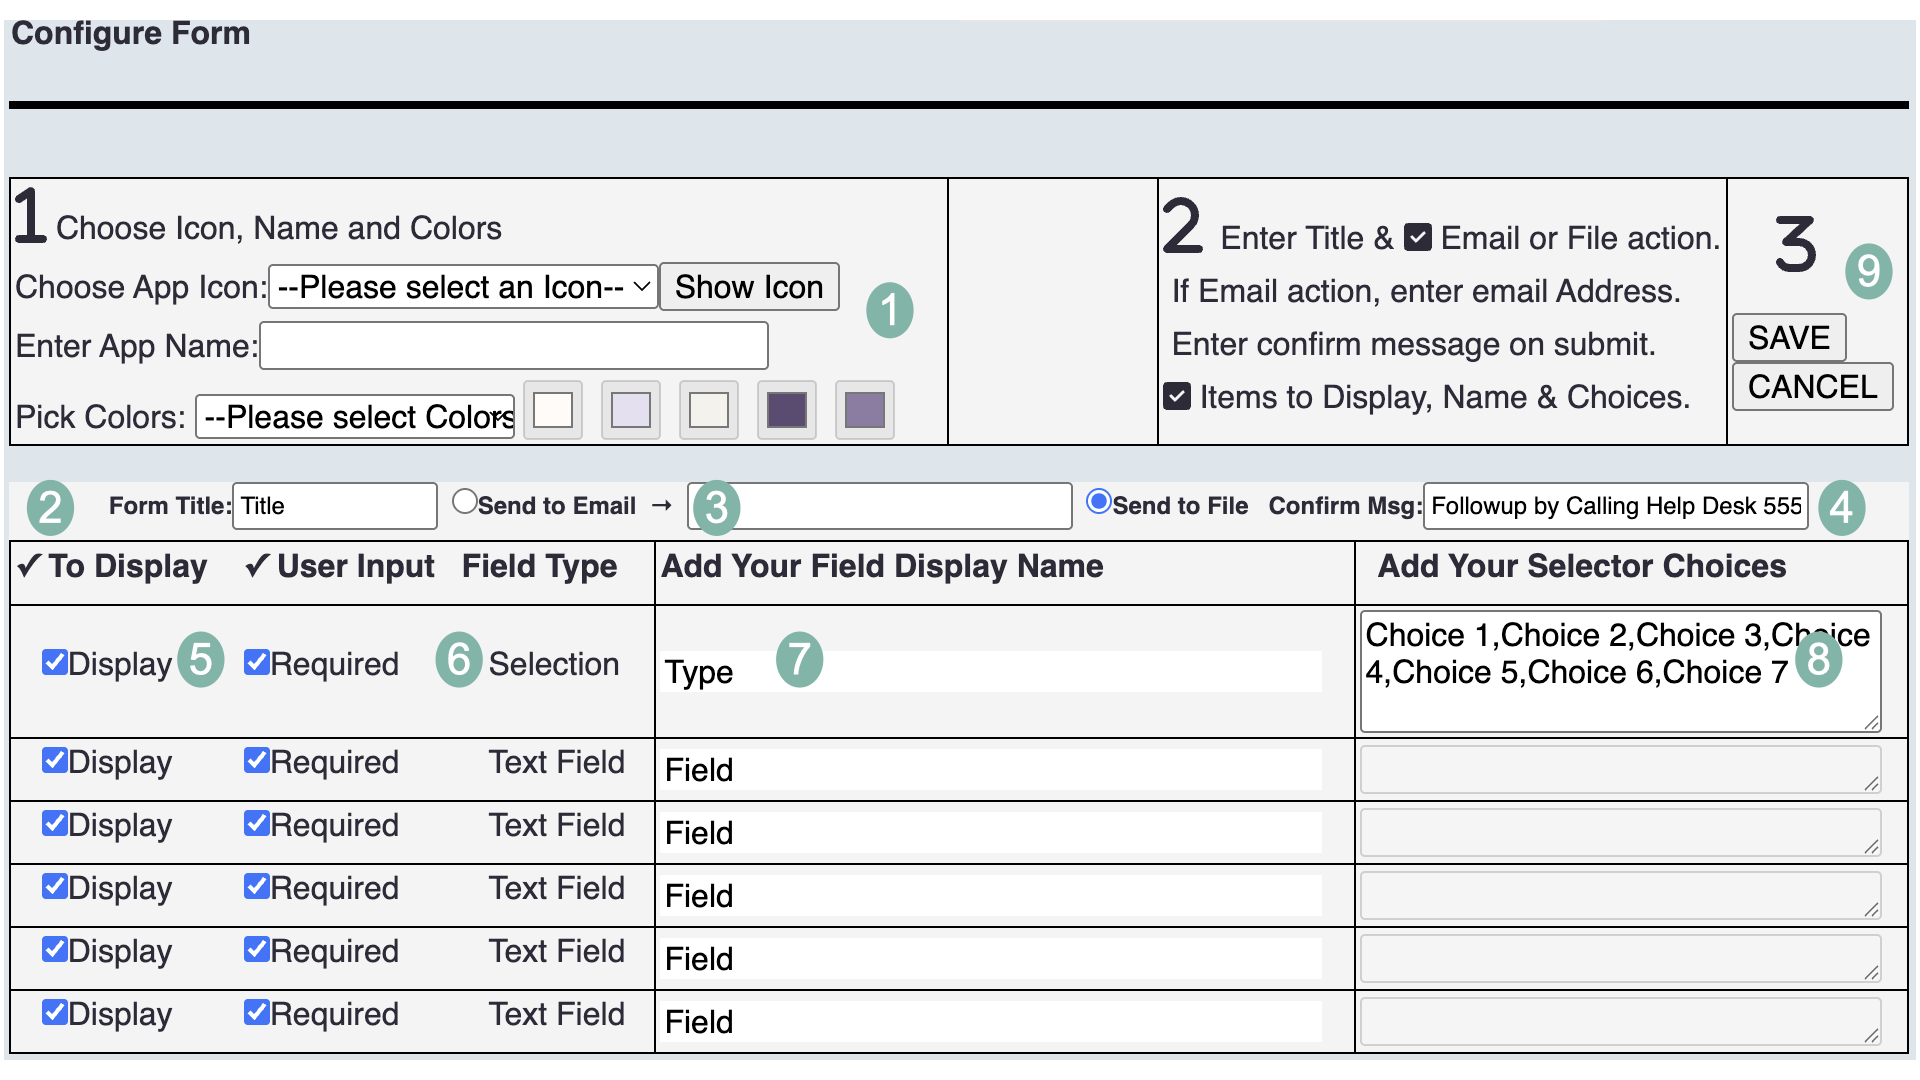
WorkFlows 3.8
This Section Covers Initiating a neuMoGo WorkFlow with a Form.
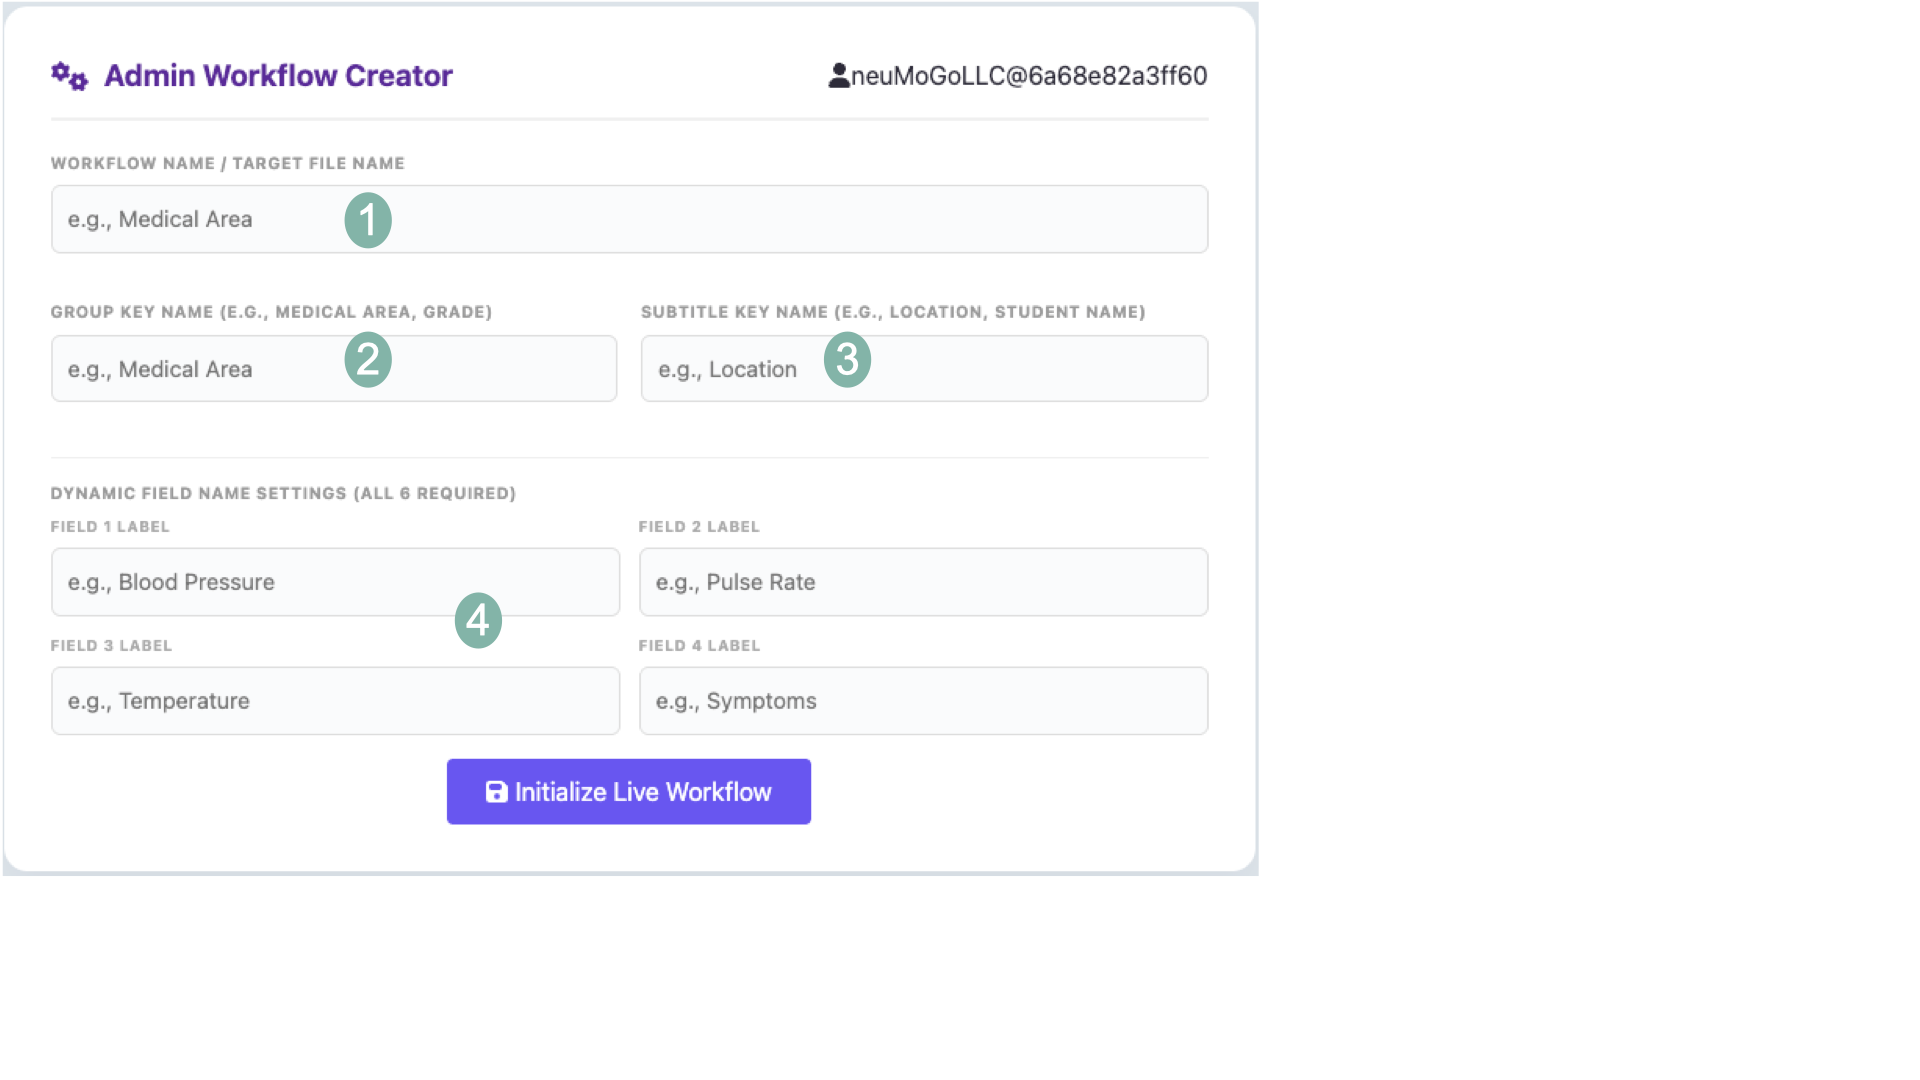
First determine the organization of data in the WorkFlow by Grouping and Subgrouping, such as grade level and student name or geogrphic area and customer name for sales.
Then create the WorkFlow Form for Data Entry by Employees.
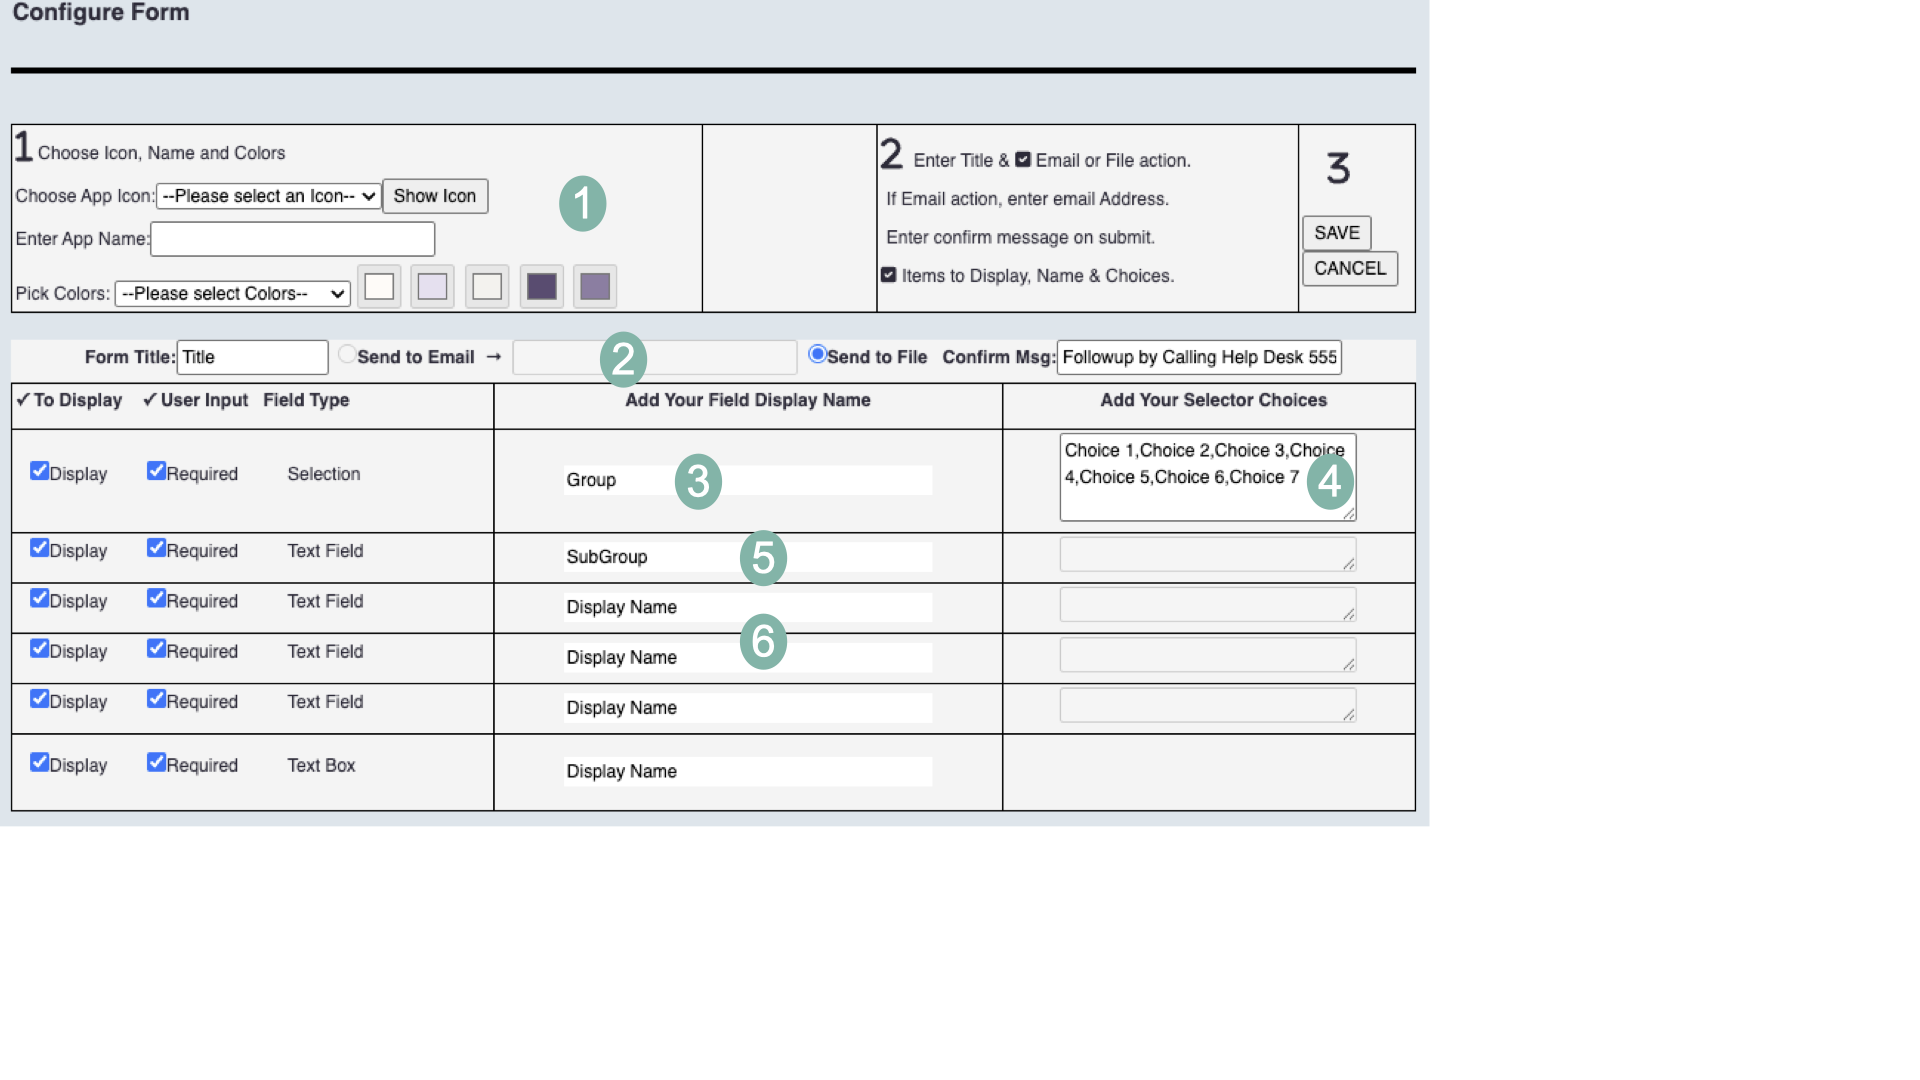
1 Select the app icon for HomeScreen, enter app name and select a color palette.
2 Enter the title to appear at the top of the form. Once saved, app name and title cannot be changed.
3 All WorkFlow Form output will go to a database that will be use for Admin edit and mobile display.
4 Enter the message you want for the pop up after form submisson. Can include contact phone number.
5 Check or uncheck Display to include or exclude from Form and Required on not Required for submission.
6 The first two fields are Grouping and Subgrouping (e.g. Grade and student name).
7 Enter the label you want to display field names below each Grouping and Subgrouping.
8 Enter comma delimited Groupings known choices (new ones can later be added by Admin Edit.
9 Save or Cancel the WorkFlow. If editing a WorkFlow, you can also delete it.
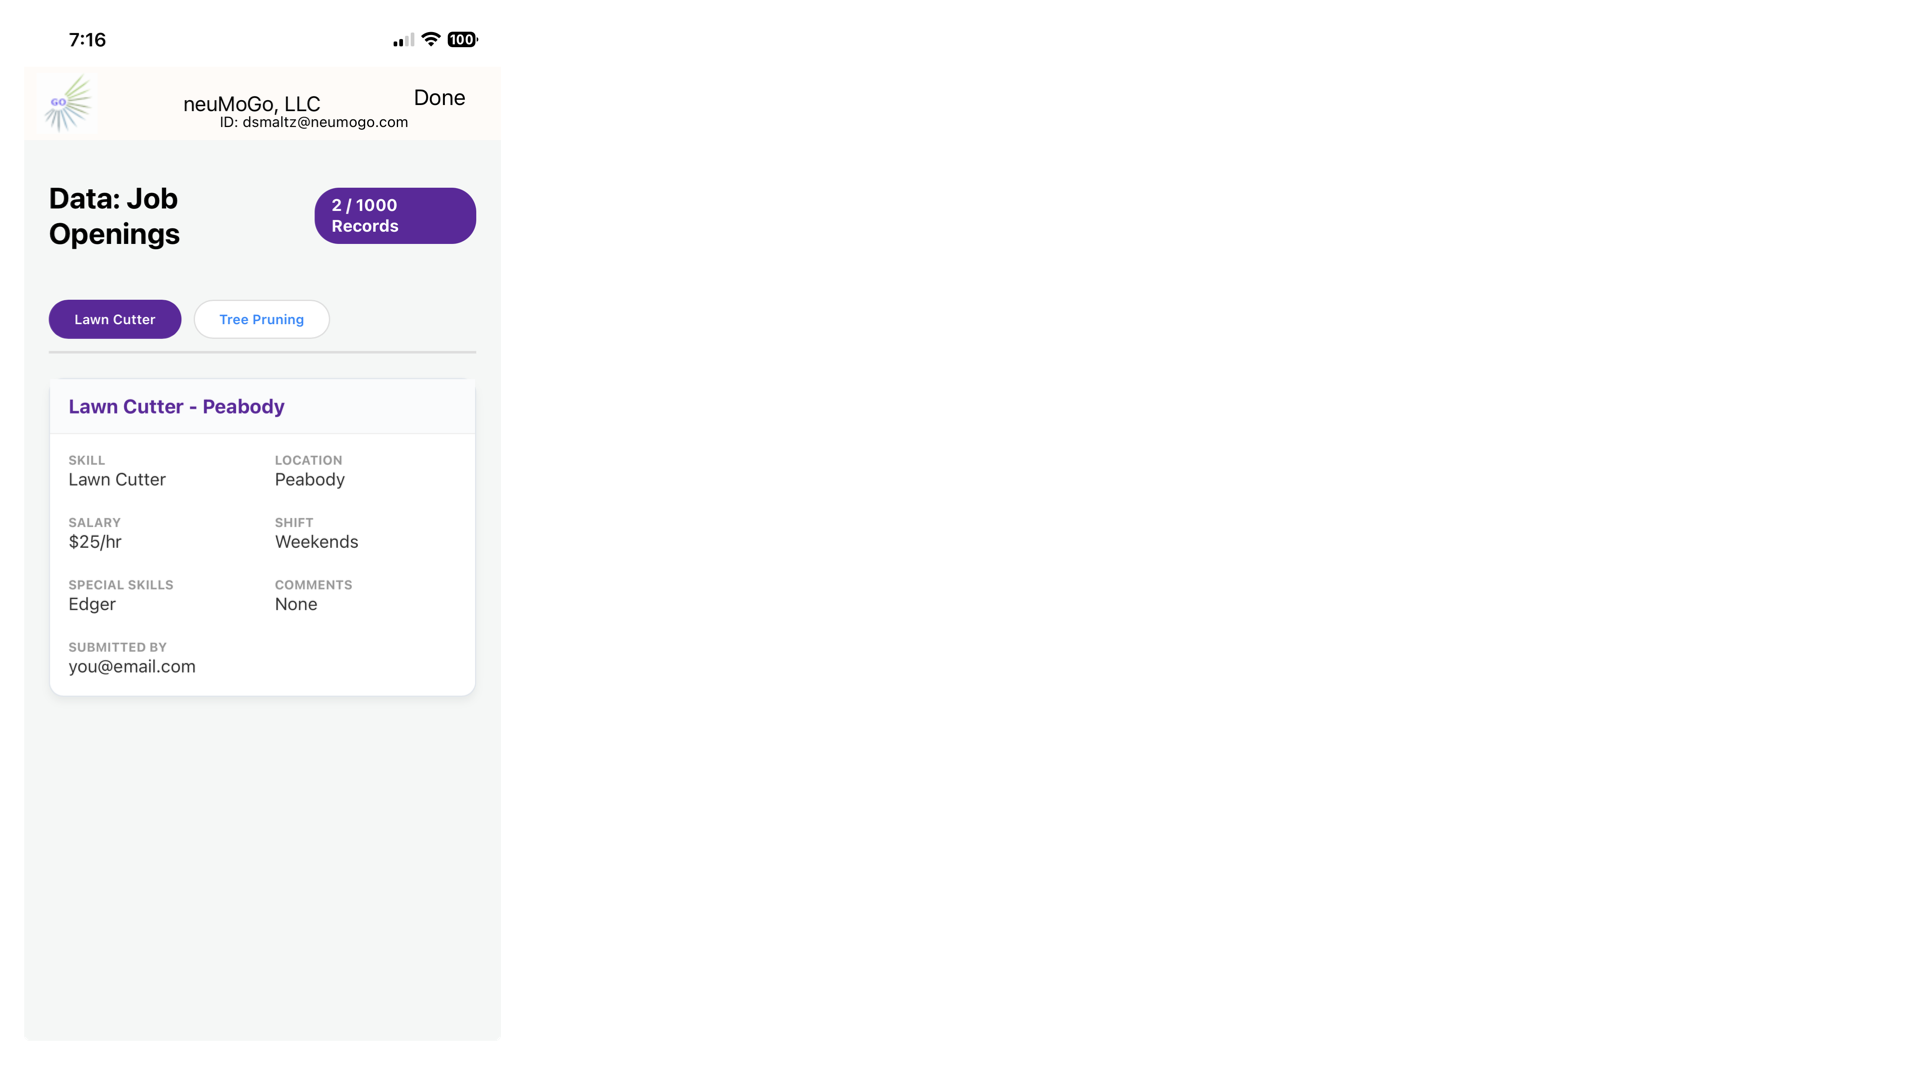
Populate the WorFlow by entering data and then use the "View and Download Data Tool" to Edit and Add to the WorkFlow.
If you delete the WorkFlow Form, you do not have to delete the mobile viewer. Admins can continue to edit/add data for viewing only.
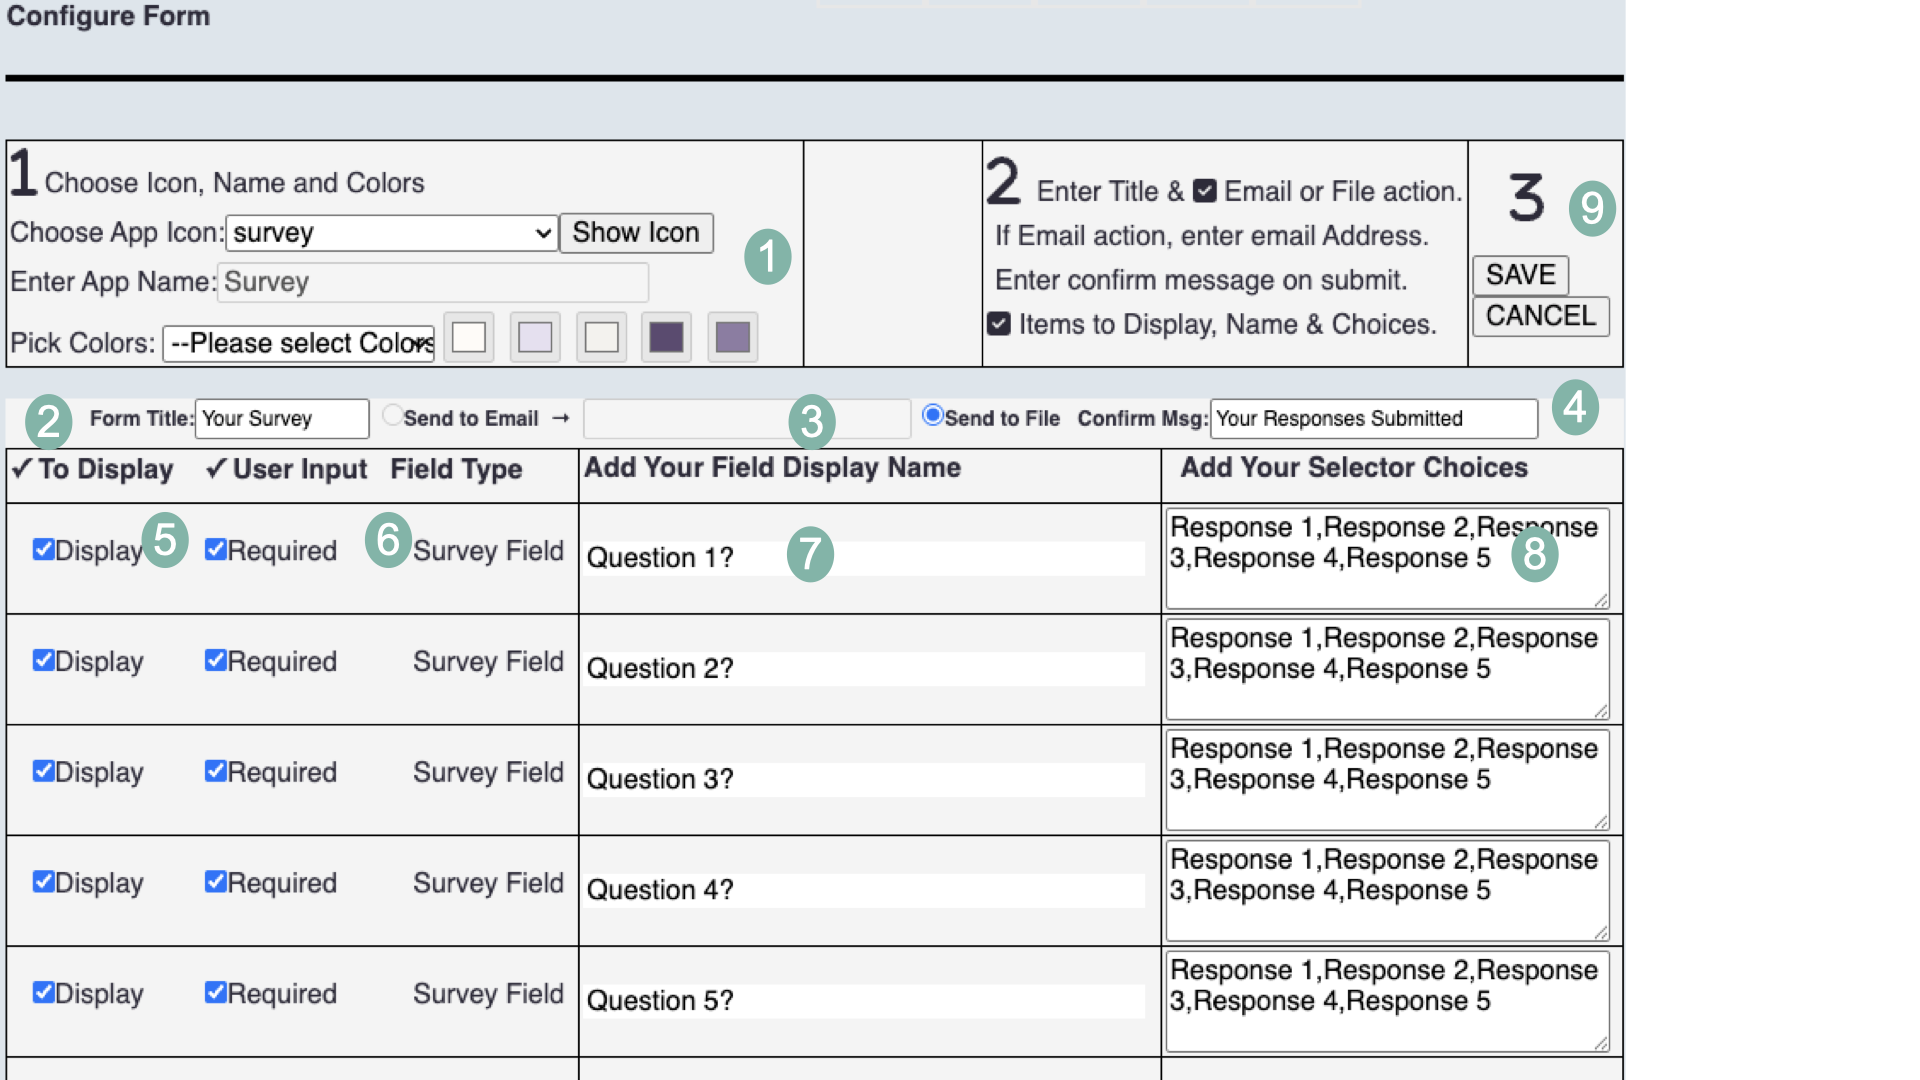
Surveys 3.9
Use this template to initiate a Survey
Only one Survey at a time is allowed. Download Survey data & delete the survey before new one.
See View and Download Data for reporting and data download
1Select the app icon for HomeScreen, enter app name and select a color palette.
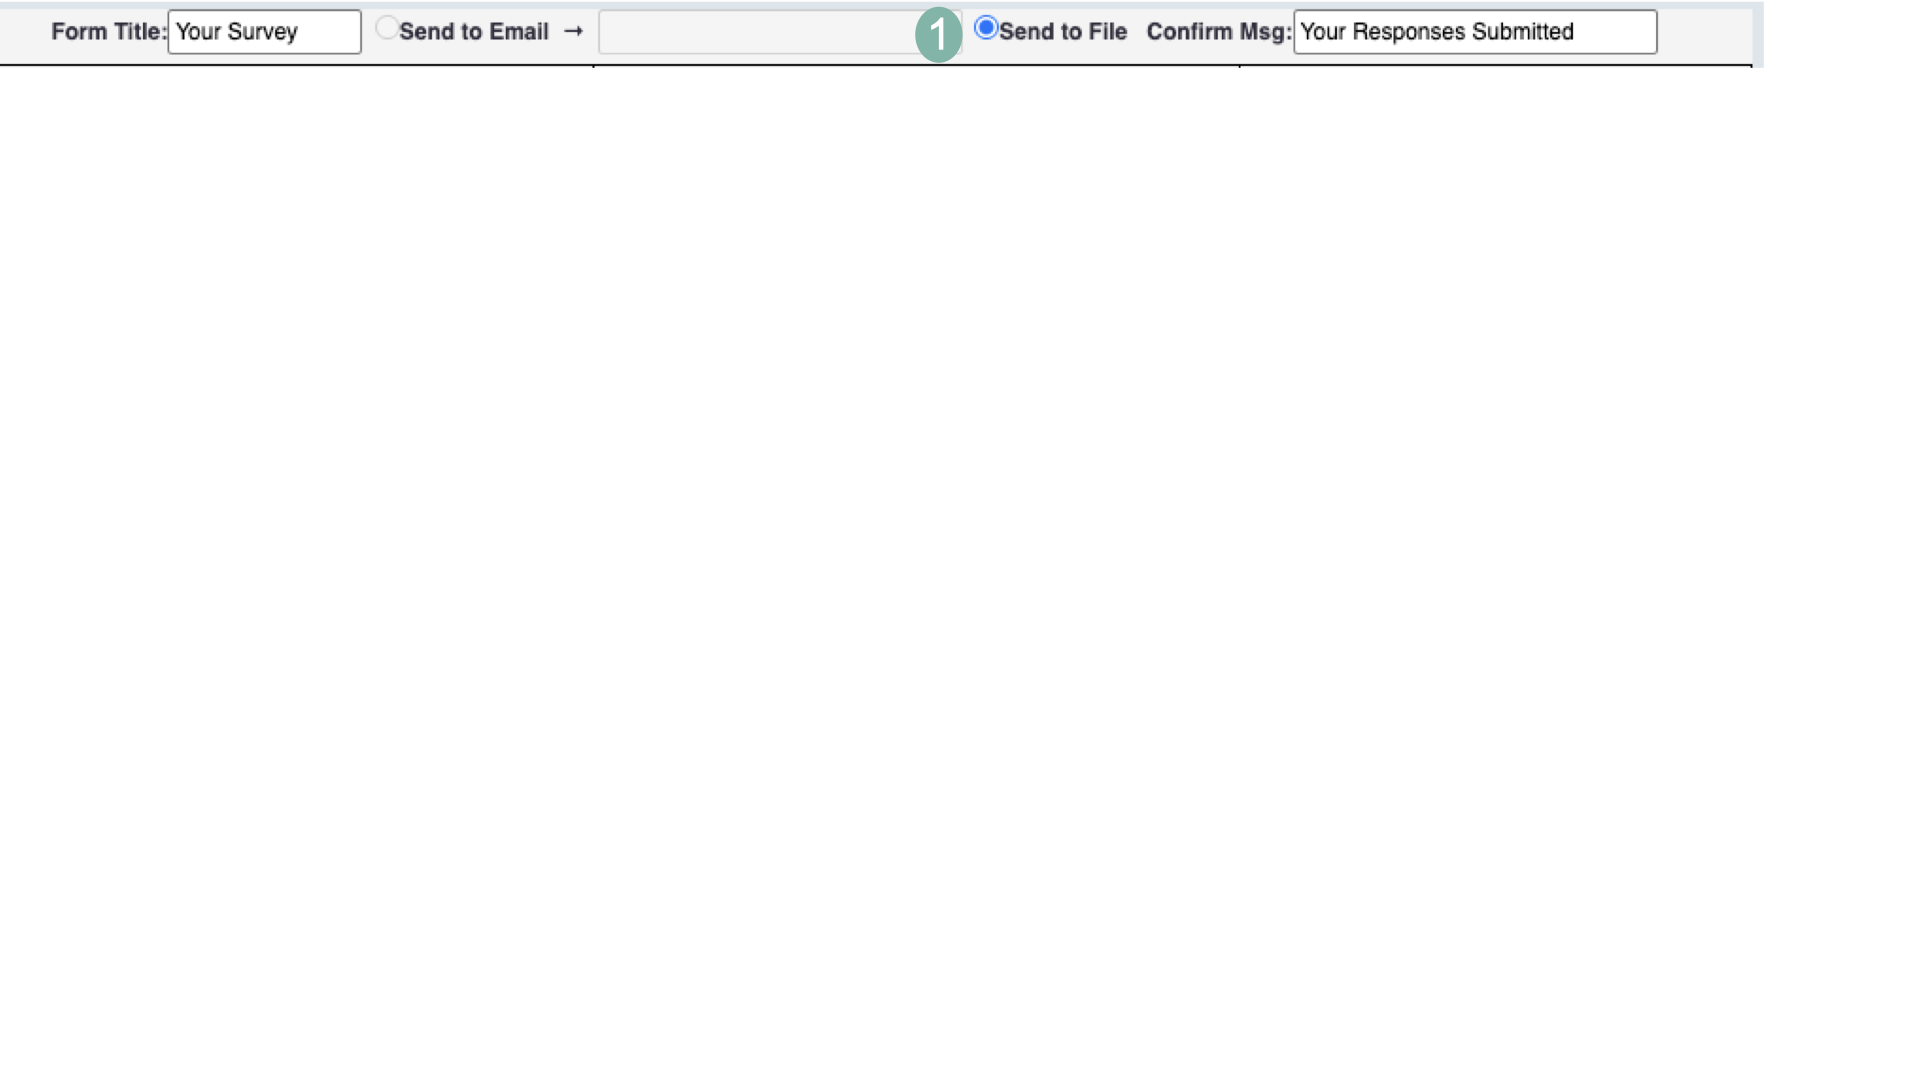
2 Enter the title to appear at the top of the form. Once saved, app name and title cannot be changed.
3 All Survey data goes to a file and not email.
4 Enter the message you want for the pop up after Survey submisson. Can include contact phone number.
5 Check or uncheck Display to include or exclude from form and Required on not required for submission.
6 This is an informative display of field type.
7 Enter the Survey questions here.
8 Enter comma delimited answers for the questions. Best to use a note pad to enter and then paste it here.
9 Save or Cancel. If editing a Survey, you can also delete it.
If you delete the Survey Form, you must delete the Survey file in View and Download Data (optionally you can dowload it first).
neuMoGo App Security 8.1
The neuMoGo app is downloaded by employees from the Apple AppStore and Google PlayStore and installed on the device. Employees click on the neuMoGo icon to enter the private HomeScreen filled with what is built using the neuMoGo Builder.
No data is stored on the employee devices except user credentials to login to neuMoGo and canched icons used on the private HomeScreen.
The neuMoGo app is secure on devices and only requires permission to access the internet and it prompts for user permission to use the camera to scan QR/Bar Codes and take pictures to save with form output.
When employees are deleted using the neuMoGo Users Tool, the next time the user loads neuMoGo it will fail and display and login panel.
Be sure to remove the employees company email to prevent the terminated employee from getting a new neuMoGo login and pin to login.
If a user login is compromised, delete and create a new login with same email address and a new pin will be sent to the email address of the user.
neuMoGo Data Security 8.1
Data is segregated by your unique customer Account Key.
Data is backed up daily and the "View and Download Tool" provides CSV data downloads.